
 |
| Double click on image to zoom in for details |
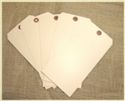
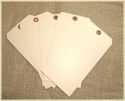
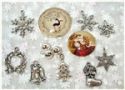
For this week's challenge, I have done something a little different. I had a customer of my Funkie Junkie Boutique who had questions about the Vintaj Adhesive Metal Sheets and as I looked more closely at the product, I got the itch to play around with it myself. That started me thinking about what I could do with it for a Christmas tag. It comes in silver and copper. Silver would have been more Christmas like, but I really wanted to try out the copper, so I did. But first let me tell you how I did the background on my tag.

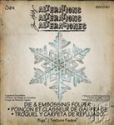
Next I cut a piece of specialty stamping paper and applied the copper metal foil to it. That paper is a bit thicker and more sturdy than the regular card stock I use. Then it was run through the Big Shot with the Layered Snowflake die (I have a good supply for sale in the boutique) and embossed with the texture fade that comes with the die. At that point it was bright shiny copper. But I wanted it to look weathered so I used the Weathered Copper Vintaj Patina paints on it. The paint was partially wiped off while wet and the burnished with the Vintaj burnishing tool. I absolutely LOVE the way it looks now! Then I created a little embellishment for the top. I wanted to test the patina paints on the copper to see how they would look before I applied them all over the large textured snowflake. So I cut a small square and ran it through the Big Shot in the very center of the snowflake texture fade. Then I applied the green and turquoise paints as a test. I thought it was kind of cool and couldn't bear to throw it out. I added a small copper ring fastener that I also aged with the patina paints. The snowflake charms were silver tone and I copper embossed them, then painted them with the verdigris colors of Vintaj paints.


These supplies are available at The Funkie Junkie Boutique where Ranger/Tim Holtz and most other name brand products are always 20% of MSRP.
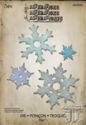
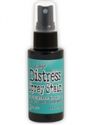
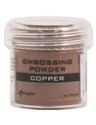
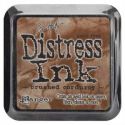
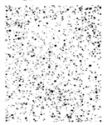
Since my focal point was going to be snowflakes, I really wanted to make my background related to snowflakes too. I felt like stenciling but I don't have a snowflake stencil. But what I do have is a Sizzix Bigz snowflake die (Tim Holtz Stacked Snowflakes L Die). I cut the front panel off the acrylic package that the die came in and ran it through my Big Shot, cutting out the snowflakes and leaving a stencil. But it didn't fit my jumbo tag so well so I decided to lay the snowflakes I had cut on my tag. I arranged them to my liking and then misted with Distress Stain in a mini mister since I don't have many of the hew Distress Stain sprays. I really don't know what color this is. I already had the stain in the mini mister from another project. I think it is Evergreen Bough, but I'm not positive. The one on the left is the one I sprayed. Then I carefully lifted the acrylic snowflakes off the tag. Without wiping off the distress stain, I arranged them on my craft sheet and then laid a tag over top of them and burnished it. The result is on the right. There was also some spray on the kraft sheet which was picked up along with what was on the snowflakes. I decided I liked the one on the right better and went with it. I sponged around the edges with Brushed Corduroy and then sprinkled copper embossing powder around the edges which stuck on randomly. Then it was melted with my heat tool. I also made a few little snow dots using Wendy Vecchi's splatter stamp and Snow Cap pigment ink but they don't show up much in the photo.
Next I cut a piece of specialty stamping paper and applied the copper metal foil to it. That paper is a bit thicker and more sturdy than the regular card stock I use. Then it was run through the Big Shot with the Layered Snowflake die (I have a good supply for sale in the boutique) and embossed with the texture fade that comes with the die. At that point it was bright shiny copper. But I wanted it to look weathered so I used the Weathered Copper Vintaj Patina paints on it. The paint was partially wiped off while wet and the burnished with the Vintaj burnishing tool. I absolutely LOVE the way it looks now! Then I created a little embellishment for the top. I wanted to test the patina paints on the copper to see how they would look before I applied them all over the large textured snowflake. So I cut a small square and ran it through the Big Shot in the very center of the snowflake texture fade. Then I applied the green and turquoise paints as a test. I thought it was kind of cool and couldn't bear to throw it out. I added a small copper ring fastener that I also aged with the patina paints. The snowflake charms were silver tone and I copper embossed them, then painted them with the verdigris colors of Vintaj paints.
And that's it! I had a great time making this tag. I hope you will join in and make something you enjoy as much as I did.
And before I go, I wanted to share a photo. I had the privilege of taking two days of classes with Wendy Vecchi last Friday and Saturday. Wendy is such a sweetheart. We all had the best time with her and learned so much. It was an experience not to be missed! Check out her class schedule on her blog and see if she is doing a class anywhere near you. I had to drive 75 miles and stay overnight and it was totally worth it! Her teaching schedule is on her blog's sidebar.
These supplies are available at The Funkie Junkie Boutique where Ranger/Tim Holtz and most other name brand products are always 20% of MSRP.
 |  |  |  |  |
 |  |  |  |  |
 |  |  |  |  |
 |  |  |  |  |
 |  |


13 comments:
Your tag is gorgeous Linda, I love how you created the wonderful background.
How amazing to spend time with Wendy! Cannot wait until she comes over here next year, so looking forward to meeting her in person.. Hugs, Anne x
Great tag and description. Fab picture of you and Wendy. So glad you enjoyed your time with her. She is such a great teacher.
I love your tag, Linda. The Vintaj paper is really cool. I have to try some! Can't believe we're at week 3!
Every year I say I ma going to do these and every year I find I never have the time.. but it doesn't matter cos I can just gaze at yours!! Adore this beautiful tag and a gorgeous pic of you both!
What an awesome photo...and another adorable tag. I might be back in blogland soon.
I absolutely love this tag! That snowflake splattered background is such an effective idea and really compliments that Vintaj copper sheet ornament.
The photo of you and Wendy is wonderful. So glad you got the chance to take her class and catch up with her. Can't wait for it to be our turn in the UK next year. Jenny x
Another fab tag Linda, I was so inspired by the snowflakes and the metal. I am managing to keep up so far. What a lovely photo of you with Wendy. Have a great weekend x
What a beautiful tag!! Love the stenciled snowflakes. Have a good weekend!
Jen
I'm so happy that we got to meet!
thanks for coming.
ps...love the tag!
Absolutely stunning tag! LOVE the artsy feel, and the added metal! Just so gorgeous! So glad you met Wendy too...great pic!
I LOVE those colors that you used! So pretty! I am kinda hankering to try that metal you used...oh my sounds delish!
This is my favourite of both yours and mine so far Linda. I have been very good and only looked at them as I am doing them as I don't want to jump forward a few!!
Beautiful and thanks for the inspiration!
xx
Post a Comment