Tuesday, May 27, 2014

Sunny Seaside


Hello and welcome!  I know I've been missing in action around blogland recently.  My life is a scramble trying to keep up with everything happening at the boutique, my design team commitments and my personal life.  Whew, some days I don't know which end is up!  I was skeptical about getting a piece made for the Funkie week of the Vintage Seaside challenge at Frilly and Funkie.  I totally missed contributing anything to the team last week so I really needed to produce a piece for this week.  I was pretty stressed about the situation and feeling totally devoid of mojo with no idea of what to make for this week.  Finally in frustration, I just went into my craft room and sat down at my desk, pulled out a tag and started to play around.  This was the outcome - sort of fun and whimsical with lots of colors.

I started with a jumbo manila tag and the Tim Holtz bubble stencil.  Picket Fence distress paint was stenciled on and dried.  Then I sprayed it with a mix of Peacock Feathers and a dash of Evergreen Bough distress stains, followed by a very quick light mist of Vintage Photo (stains were transferred into Mini Misters for this step).  Then the edges were inked with Vintage Photo DI.

The beach houses were stamped on book paper using Jet Black archival and then stained with Squeezed Lemonade, Picked Raspberry and Mowed Lawn.

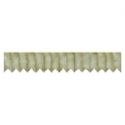
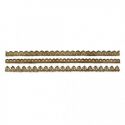
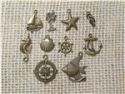
The Chevron Frameworks die was used to cut gray chipboard which was painted white with Picket Fence Distress Paint.  I thought it made a cute be achy fence.  Then I hung bronze sea inspired charms along my fence. When we are at the seaside, I always see fences with ocean/beach inspired objects hanging on them so I did the same my charms and my fence :)

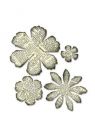
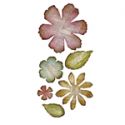
The flower is just two layers of card stock, the smaller one was cut with the Jumbo Tattered Florals die and the larger one was cut with  the Tattered Florals die.  Both were stained with Squeezed Lemonade stain, crumpled, dried, spritzed with Biscotti Perfect Pearls and dried again.  And, of course, I inked the edges with Vintage Photo.  The pretty turquoise gem center for the flower is from my boutique.

I created a couple of bunches of sea oats using unraveled burlap fibers.  The sentiment was stamped with Jet Black archival and the banners were hand cut.  A bronze angel fish finished it off.

Thanks so much for stopping by.  Hope you will run over to Frilly and Funkie.  The team has some great eye candy plus Donna Gibson is back for a quick guest design week.  She has contributed an awesome vintage beach piece!


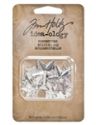
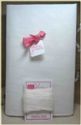
The products below were used to make the tag above and area available at The Funkie Junkie Boutique where Ranger/Tim Holtz and most other name brand products are always 20% below MSRP.

Sunday, May 25, 2014

Celebrating Memorial Day!

Hi there!  I'm here today to share the StepXStep I created yesterday for the Frilly and Funkie blog, and to wish my American friends a happy Memorial Day.  

I wanted to so something patriotic for this important holiday so I pulled out my Artistic Outpost Hero set.  I was going to use the soldier image but started looking at the collage stamp with Rosie the Riveter on it and decided to go in a more feminine direction.  While she might not have been an enlisted person, the "Rosies" of the WWII era made an important contribution to the war effort and I thought it would be great to recognize that this Memorial Day.  
I started thinking about how I could bring in some red and white strips to signify our American flag and decided to stay with the feminine feel by making my stripes a flower.  I cut three flowers out of crinoline with my Tattered Florals die and dyed them with Barn Door distress stain.  If I am dying a large batch of crinoline flowers, I usually make up a dye batch with reinkers, but to dye just a couple of flower layers, pulling out the distress stain is quick and easy.    I dried my flower layers with my heat tool.  
The left over ink also got dried with my heat tool so I misted it to rehydrate the ink and then blotted my tag into it.  I dried the first layer and blotted it again.  I ended up doing that three times to create the base layer of my tag.  
I wanted the flag stamp on the tag but was in a frame and had other images and a sentiment that I didn't want, so I masked off those areas with masking tape before I inked up my stamp.  
 The stamp was inked with cobalt archival ink.  
 The tape was peeled off before stamping.
Stars were added using the Tim Holtz Stars Layering Stencil and white Wendy Vecchi embossing paste. I applied the embossing paste with my finger - I find it gives me much better control over where the paste is applied than using a palette knife. 
 I added a bit of bling by applying distress glitter directly to the wet embossing paste.  
Carrying on with the flag look, I cut banners from red kraft core and white card stock.  The HERO was stamped in Cobalt archival, snipped apart and the edges were inked with Vintage  Photo.  I wanted some sort of blue panel to mount my stars on so I cut a Tattered Banner from blue kraft core, sanded and inked it before adhering the stars with Multi Medium Matte.  
To continue with the feminine theme, I gave Rosie a topper cut with the Vintage Lace die and a pretty red crinkle ribbon bow held on with a Gem Clip and topped with another Mirrored Star.  
The tag was finished off with a red and white crinoline flower, topped with a white distress glittered star and a blue star button.  
Thanks for hanging in with me for this StepXStep.  I wish you all a wonderful weekend wherever you are and a happy and safe holiday weekend to my American friends!


These products are available at The Funkie Junkie Boutique, where most name brand products are always 20% below MSRP!


Blog Widget by LinkWithin


I changed my font at thecutestblogontheblock.com