Monday, November 23, 2015

Challenge: 12 Tags of Christmas - Funkie Junkie Style - Week #9

Double click any image to zoom in for details.
Welcome back to Week #9 of the 12 Tags of Christmas Funkie Junkie Style.  I'm gearing up for a very busy week, preparing for Thanksgiving and the visit of my two adult children as well as organizing the shop for our Black Friday sale.  Fortunately, I not only finished Tag #9 but I have a head start on Tag #10 for next week.

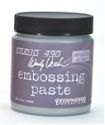
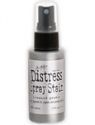
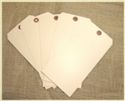
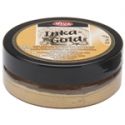
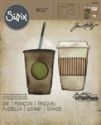
This week I decided to play with the Fresh Brewed Bigz die.  I'm not a Starbucks addict, but I do like to partake of their seasonal drinks once or twice each season.  One of my favorites is Peppermint Mocha which inspired this week's tag.  I started with my normal jumbo manila tag and stenciled Texture Paste through the Tim Holtz Christmas stencil.  When the texture paste had dried I sprayed the tag with Barn Door and Mowed Lawn distress stains.  Once all that was thoroughly dry, using my finger, I rubbed Inka Gold Old Gold all over the tag, on the raised letters, around the, in between them.  It wasn't a thick coat, but rather just enough to give it a nice sheen.


My red cup was cut from Core'dinations Kraft Core and sanded slightly.  I created the whipped cream with more of Ranger's white texture paste.  Then I realized I need tiny chocolate chip sprinkles for the whipped cream.  These were created by mixing several drops of Archival Coffee reinker into the Ranger Texture paste.  Once I had the color I was going for, I made a few small lumps of the mixture and set them aside to dry.  Once they were about 95% dry, I rolled them between my fingers to shape them.  They were adhered with Ranger Multi Medium Matte, which is water based.  I can see in the photo that the water base caused the color to bleed a bit.  That's because I started with a drop of Frayed Burlap reinker which is water based.  Then I went to the Coffee Archival to deepen the color.  If I had just used the archival reinker, I don't think I would have had that bit of color bleeding around the chocolate chips.  Live and learn, right?

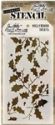
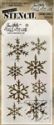
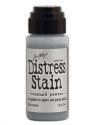
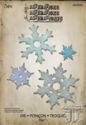
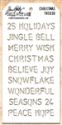
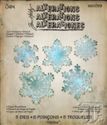
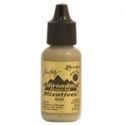
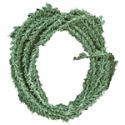
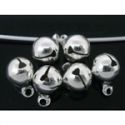
The snowflake was cut with the Paper Snowflakes thinlits die set.  I used Gold Alcohol Ink Mixative on the jingle bells (started out silver), on the gumdrop (started out clear) and on the gold holly berries (started out shiny gold and I wanted the matte gold to match the other embellishments).  The holly leaves were cut from white card stock with the Festive Greenery decorative strip die,  colored with Mowed Lawn distress stain and edged with more of the Inka Gold Old Gold.  The sentiment is from the new Scribbly Christmas stamp set, stamped in Mowed Lawn distress ink.  It was cut freehand, smeared with a bit more Mowed Lawn ink and then edged with more Inka Gold.


That wraps up Week #9.  Many thanks to all who are playing along with my challenge.  Can't wait to see what you will make this week!


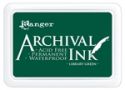
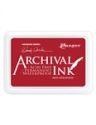
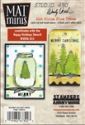
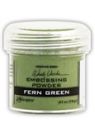
These products were used to make the above tag and are available at The Funkie Junkie Boutique where Tim Holtz and other name brand products are always 20% below MSRP.


Monday, November 16, 2015

Challenge: 12 Tags of Christmas - Funkie Junkie Style - Week #8

Double click to zoom in for details
Eight down, four to go!  Are you playing in my 12 Tags of Christmas Funkie Junkie Style challenge this year?  If so, how are you doing?  We are now 2/3rds of the way through the challenge but there is still time if you want to jump in and play along.  You can find all the challenge requirements in the Week #1 post here, but basically, you just have to make some sort of winter/Christmas craft inspired by my tag and link it to the proper week no later than December 20th.  You can complete one or all of the 12 challenges and if you do complete all 12 by December 20th (and comply with all the challenge rules) your name will go into our prize drawings.

Here is my tag #8.  It's another tag with a folksy homespun feeling using Wendy Vecchi plaid and polka dots.  I wanted a vintage brown background but I also wanted some traditional Christmas reds and greens for this piece.  I started with a jumbo manila tag and stenciled on Ground Espresso though the Tim Holtz Holly Bough Layering Stencil.  Then I sponged the entire tag with Vintage photo and did a little spritz and flick.  Then I sponged all the edges with more Ground Espresso.

I decided to add a few banner strips stamped with some of Wendy Vecchi's background stamps in Library Green and Red Geranium archival inks.  I cut up a couple of my manila tags to create the banners, stamped them and edged them with Ground Espresso.

Next came my little grove of evergreens.  They are Mat Minis by Wendy Vecchi.  You get a sheet of white and a sheet of black trees.  These trees were white so I went over them quite heavily with Ground Espresso ad then lightly and spottily embossed them with Wendy's Fren Green embossing powder.

Using offcuts from the banners, I stamped Believe from License Plate Art in Red Geranium and then also used Red Geranium embossing powder to make it bold and shiny.  My sentiment is mounted on a left over strip from the plaid banner.

Using my Red Geranium pad direct to paper, I colored a piece of white card stock and then cut it with the Impression Obsession Ornament Flourish die.  This is such a lovely and delicate die and if you love flourishes, it's a die that you can use throughout the year as the flourishes are actually separate die cuts when they come out of the die.

My Tag #8 was topped off with a pretty piece of May Arts plaid ribbon with a gumdrop stuck in the middle for a little sparkle.

Thanks so much for all the comments and those of you who are playing along - a huge thanks for that.  I've been swamped, but I promise I'll be around to visit your blogs and see your amazing creations up close and personal this week.


The products below were use to make the above tag and are available at The Funkie Junkie Boutique where Tim Holtz and Wendy Vecchi products are always 20% off.


Monday, November 9, 2015

Challenge: 12 Tags of Christmas - Funkie Junkie Style - Week #7

Double click any image to zoom in for details.
Welcome back to The 12 Tags of Christmas Funkie Junkie Style!  It's Week #7 and we are starting the downhill slide to Christmas.  It seems hard to believe it's just around the corner, especially since we are still in the high 80s in here in north Florida.  We had one week in early October with cool dry temperatures but since then it's been hot and humid - unseasonably warm.  I am so ready for some fall temps!  It's making it hard to get into the Christmas mood to do my tags.  But I have to thank Tim Holtz for such an amazing selection of new Christmas products to get my mojo flowing!  He's had a banner season, especially with the awesome Idea-ology Yuletide collection and now with some fun Ranger goodies too.

A few weeks  back we received the new Frozen Foil Transfer Sheets and the Frozen set of Stickles.  I knew that I would have to play with these wonderful colors.  They were my inspiration for Tag #7.  I started with Wendy Vecchi's new Text background stamp and used it to stamp on of my favorite jumbo manila tags using Jet Black archival ink.

Once stamped, it was given a few shots of Brushed Pewter distress stains.  Don't forget, when you use Tim's spray stains, you need to make sure you wipe any spray from the nozzle.  There is a resin in the spray and it gums up the tiny spray hole if you leave it there to dry.  When I went to use my Brushed Pewter, I couldn't get it to spray properly.  I rinsed it under hot running water, but no luck.  It only splattered out blobs.  Fortunately I had a couple of brand new sprayers from Dyan Reavely.  Her sprayers for the Dylusions sprays also fit Tim's distress sprays.  If you don't keep a couple of these sprayers on hand, you are apt to be frustrated when your distress sprays suddenly won't spray!

Next, using the new Tim Holtz Snowflakes Layering Stencil, I applied Wendy Vecchi's Silver embossing paste.  Once it was dry, I simply rubbed the Frozen Foil Transfers over the embossing paste.
Next up was the creation of my gorgeous focal snowflake.  I cut chipboard with the Stacked Snowflake die and applied Brushed Pewter distress stain as a base.  Once dry, the various colors of the Frozen Stickles set were applied.  That amazing die and a few great Tim Holtz products made this lovely stacked snowflake so easy to make.  I did have to let the Stickles dry overnight thought as I applied them fairly heavily.  The tag was topped off with a silver tone snowflake from the shop and I used the silver cord that came on the Stickles set for the tag tie.  

So, Week #7 has come and gone!  If you haven't already started the challenge, it is time to get crankin'.  If you are new to the challenge, please refer to Week #1 for all the challenge requirements.  One thing I have noticed is a number of entries do not include a link to The Funkie Junkie Boutique.  Please use the URL to my shop www.thefunkiejunkie.com as we are the sponsor of this challenge with lots of great prizes and a 15% off coupon for everyone who completes all 12 of the entries CORRECTLY!

Thanks so much to everyone for their comments and for the inspirational entries for the challenge.  I can't wait to see what you all make!


These products were used to make the above tag. They can be purchased at The Funkie Junkie Boutique where Tim Holtz and Wendy Vecchi products are always 20% below MSRP.


Blog Widget by LinkWithin


I changed my font at thecutestblogontheblock.com