Sunday, December 30, 2012

Simple 'n Silly

Hello!  I hope if you celebrated Christmas that it was wonderful this year.  I got my heart's desire - a new home!  Yes, finally!!  We closed the sale on the 20th, the movers came on the 21st.  We got settled enough to celebrate Christmas here with the family.  

My apologies for being absent from my blog for so long.  I am finally getting things unpacked and finishing setting up my craft room.  But I have also had the entire rest of the house to unpack and set up so I am just getting back to blogging.  

This is a card I made for the Kudzu Kafe release last summer.  I thought I would share it for my Artistic Outpost post this week since I haven't had time to make anything yet.  I started with a piece of kraft card stock and stamped the ticking stamp in Gathered Twigs.  I stamped the cafe from the Kudzu Kafe plate and also stamped the vintage truck and the trees from Artistic Outpost's Home plate, both using Jet Black Archival ink.  I stamped and trimmed out the vintage woman from the plate and made her a little "wooden" be silly sign.  It was finished off with two rusty wire stars, die cut from the rusty tin I carry in the store.  

Thanks so much for stopping by!

Tuesday, December 18, 2012

Just in Time Christmas Tag #2


Hello and welcome back to Week Two - the Funkie week - of Terry's challenge at  Frilly and Funkie The challenge is Make it a Tag (must be a holiday tag).  I made my tag also for Tim Holtz's December tag challenge.  I couldn't put my hands on any red distress stain so I made a little puddle of watery ink by smooshing my Barn Door distress ink pad on my craft sheet and then spritzing it with water.  To that I added some Tarnished Brass distress stain and dredged my tag through it until covered.  It's a little more pink/less red than I hoped but I liked the look so I went with it.  I created the top panel with a couple of Tim Holtz stamps, masking the trees to add the text.  The deer was die cut from canvas glued onto chipboard and then run through the Snow Flurries texture fade and stained with Tarnished Brass distress stain.  Because I was using gold tones rather than silver, I altered the reindeer from the Christmas Adornments set by coating it with gold emobssing powder and heating it.  The tag photo is rather small, but by clicking it once or twice you can enlarge it and see the details.  And here is a close up of the letters.
Thanks so much for stopping by.  Be sure to stop by Frilly and Funkie and see the wonderful samples submitted by the design team.  I hope you will take this opportunity to make a just-in-time Christmas tag and play along with us.


12 Tags of Christmas Funkie Junkie Style Winners

Another HUGE thank you to everyone who played with us in this year's 12 Tags of Christmas Funkie Junkie Style!  I am SO delighted to welcome new players and to have the pleasure of welcoming back most of last year's players.  I had an absolute BLAST, not only making my tags but seeing how each one of you was inspired by my offerings.  The feedback has been wonderful and I will definitely run this challenge again next year.  Watch for the kick off in September so you don't fall too far behind.

And now, I'm excited to be able to give out some gift certificates to The Funkie Junkie Boutique.  Most of you know it is currently closed due to my move, but things are moving forward on the home front and I am really hoping to be back in business the first week in January.

I have three gift certificates to give out.  The first is the grand prize winner of a $50 gift certificate and that goes to
 #22 - Silvia
 and the two runners up $25 gift certificates to go

 #5 Sue :)
&

#10 Jane

And just to recognize and thank each and every one of you who crossed the finish line, I have a 10% discount coupon that can be used at The Funkie Junkie Boutique, should you wish to shop there.

Congratulations to the winners and all who finished this challenge.  Please email me at thefunkiejunkie@gmail.com for your gift certificate codes and 10% off coupon codes.  

(And please make sure you put 'the' in front of thefunkiejunkie@gmail.com - the guy who has the same address without the 'the' gets a bit testy when he gets a flurry of my emails - LOL).


Wrapping Up the 12 Tags of Christmas Funkie Junkie Style


Hello friends, followers and players in this year's 12 Tags of Christmas Funkie Junkie Style.  Wow, I am so excited and honored by the number of players and the terrific artistry put forth in this year's entries.  I am wrapping up the challenge by reviewing the entries and will do a Random.org selection of three winners later on today.  Right now, I wanted to clarify who will be in the drawing.  We had an amazing 26 entries this year and I have given each finalist a number which will correspond to the winning Random.org selections.

A huge thank you to everyone who entered and a big congratulations to all of these finalists for finishing the challenge:

1. Evelyn
2. Cheryl
3. Yvonne
4. Anita
5. Sue :)
6. BBart
7. Leesa
8. Astrid
9. Anni
10. Jane
11. Alison/Craft Trog
12. Karenliz
13. inkypinky
14. Butterfly
15. Viktoriya
16. Lisa M.
17. Claire C.
18. Dean Designs
19. Chris D.
20. Hettie
21. Buttons
22. Silvia
23. Diana F.
24. Connie
25. Kate
26. Mitra

If you believe you completed the challenge but do not see your name listed here, please contact me ASAP at thefunkiejunkie@gmail.com.  Before the winners are announced, I will be checking the posts of the Random.org picks to make sure they have completed all of the challenge requirements.  If they have not, I will do another draw.  I'm sorry to be such a stickler for the rules, but it isn't fair for some to meet all the requirements and then have someone win who did not :(and yes, I know Butterfly can't win because she resisted Christmas too long - LOL, but wanted to recognize her as one of those who crossed the finish line:)

Thanks again and stay tuned for the winners' post this evening.  I will be awarding one $50 gift certificate and two $25 gift certificates to The Funkie Junkie Boutique.


Sunday, December 16, 2012

Promises to Keep


Hello friends,

Just a quick posting this morning for Artistic Outpost.  I made this green and silver Christmas card using the Snowy Woods plate from Artistic Outpost.  The main image and sentiment were stamped with Jet Black archival, colored with distress ink pads and sponged with Vintage Photo DI.  I silver embossed the pine branches along the top and then sponged Pine Needles DI over the panel.  Then I dabbed some Brushed Pewter Distress Stain on my craft sheet, spritzed it with water and laid the panel on it, resulting in lightly mottled silver over the sponging.  The snowflakes were cut from Ranger foil tape with Spellbinder dies as was the label die cut used in the bottom cluster.  Silver ric rac and the bells from the Tim Holtz Christmas Adornments were the simple embellishments used.

That's it, quick and easy for today.  Let me know if you have any questions and thanks so much for stopping by!


Saturday, December 15, 2012

It's a Purple and Silver Christmas


Welcome back friends and followers.  Today I am sharing my Our Creative Corner project, the theme of which, set by our Christina Barnes, is a Purple and Silver Christmas.  I must say, as with many color challenges, I wasn't thrilled with the color combo.  But after I got going on it, I did a total 180 degree turn and absolutely loved it.

I started with a panel of purple Core'dinations Kraft Core, embossed it with the Christmas Backgrounds and Borders Texture Fade and then sanded it.  After that I cut a piece of Confetti Creme card stock with the TH Baroque die, heat embossed the three wise men from the Holiday Minis 4 set in silver and treated it to Tim Holtz's rusted enamel technique, sponging it with Vintage Photo DI.  The snowflake rosette is the larger Decorative Strip die that just came out this year.  I cut Confetti Creme CS with it, colored it silver with the Brushed Pewter Distress Stain and when dry, coated it with Distress Stickles Rock Candy Dry Glitter.

That's pretty much it.  I'm not giving thumbnails of products at this time because the Funkie Junkie Boutique is temporarily closed for moving.  Look for it to reopen shortly after the first of the year - a great place to spend your Christmas gift money as I will be having a reopening sale!

Now it is time to visit Our Creative Corner to see more purple and silver Christmas beauty.  Lots of pretty eye candy there this week.  We hope you will play along.  After this challenge, we are going on holiday until the first Saturday in January.

Thanks so much for stopping by and for all your lovely comments!


Wednesday, December 12, 2012

Just in Time Christmas Tag #1

Hello friends!  Welcome back and a warm welcome to my new followers too!  I'm back today to share my Just in Time for Christmas tag that I made for the Frilly week over at Frilly and Funkie.  But before I give you all the deets, I also wanted to give you an update on my housing saga.  We made an offer on another house in Gainesville, FL and have an executed contract with a move-in date of December 21st.  Yeah!  And yes, the house tested positive for radon, but this time it was quite a bit under the EPA "acceptable" level.  Apparently it is hard to find a home without radon in the area so we decided to go with this one.  I'm so excited about being able to get in before Christmas, not much before, but at least we will have furniture and I think I should be able to get my kitchen unpacked and organized and be able to cook a nice Christmas dinner for the family.  That makes me very happy! And I should be able to reopen The Funkie Junkie Boutique early in January - yay!

Back to the deets on my tag.  I started with a jumbo manilla tag and embossed snowflakes from Tim Holtz's Mini Holidays set with my favorite Enamelware embossing powder and then sponged it with Festive Berries DI.  I used the Wendy Vecchi Nature's Art stamp set, stamping the Pine Tree die cut with Pine Needles and the Tattered Pinecones die cut for the rose with Festive Berries.  I cut three die cuts with the On the Edge Snow Flurries die from white CS and applied Stickles Distress Rock Candy dry glitter using Glossy Accents to adhere it. Two of the die cuts were used as a border and the third one, I cut out the largest two and glued them over the border to pop them up.

So those are the details for this piece.  If you have any questions, just leave them in the comments section and I will update this post.    Thanks so much for stopping by.  I hope you will also check out the beautiful work on the Frilly and Funkie blog!


Saturday, December 8, 2012

One Stitch at a Time!


Hi there, I hope your weekend is off to a great start.  Today I am sharing my card for this week's Our Creative Corner challenge - One Stitch at a Time.  Our hostess is Lili Inguanti and her challenge for us this week is to use fabric and stitching on your project.  For this challenge, you have to use fabrics in any part of your card, either as a flower, a small embellishment, or whatever you want!  She also wants to see stitching, either faux stitching or machine stitching. Please specify where you used your fabric if it is not noticeable in the project, and above all have fun!

I'm a bit fabric challenged at the time, but in my exile, I managed to have a piece of red burlap that I previously stenciled in a snowflake pattern with gesso.  I decided to use it as well as hand stitching since I don't have access to a sewing machine at the moment.  The flowers and snowflakes were also left over from a prior project so this card was not too labor intensive.  As luck would have it, I also had the vintage Christmas card Photoshopped and printed.  I actually grabbed my basket of leftovers to bring with me while I am between homes.  As a result, I had a bunch of old embellishments, made but never used, that I can reach in and grab.  It all worked out pretty well for me here :)  I also added a Melissa Frances Christmas Flashcard and a couple of flourishes cut from Kraft Core'dinations with the Festive Greenery die.

I am also entering this in this week's challenge at Sugar Creek Hollow.  They want to see stenciling or masking on your project.
Here is my Photoshopped image as a freebie.  I erased the background from the poinsettias and then layered them over the Christmas music sheet cover - enjoy!

Thanks so much for stopping by and for all the lovely comments too!


Wednesday, December 5, 2012

A Light in the Darkness


Hello and welcome!  I'm back today with a sample for week #2/Funkie week over at Frilly and Funkie.  Our host, Rebecca Deeprose, has given us a theme of A Light in the Darkness.  I didn't have any candle, lights, stars or Jesus stamps to use so I decided to use the Artistic Outpost Favorite Book stamp set.  After all, I do consider reading and education to be a light in the darkness.

All card stock used here was SU's Confetti Cream.  I started with a base panel which I sponged and splattered with Weathered Wood distress ink and distress stain plus a few splats of Picket Fence distress stain.  Then, using Jet Black Archival Ink, the images from the set were randomly stamped, and the 'read' stamp interspersed between them.  The main panel and the fussy cuts were also stamped with Jet Black archival ink, the main panel was also sponged with Vintage Photo.  I used my distress ink pads and a water brush to add color the images.  The back matting panel was sponged with Dried Marigold distress ink and the outer panel was sponged with Vintage Photo.

Thanks so much for stopping by today.  I hope you will stop by Frilly and Funkie to see the wonderful samples that the rest of the team has to offer up.


Monday, December 3, 2012

Challenge: 12 Tags of Christmas - Funkie Junkie Style - Week #12

Hello friends and a warm welcome to my new followers.  I'm back today with Tag #12 of the 12 Tags of Christmas Funkie Junkie Style.  It's been a fun run for the last 12 weeks.  I have really enjoyed playing in the tag challenge and I hope you have too.  I'm so thrilled with all the new artists we have playing with us this year!  But all things must end, and this is our final week of the tag challenge.  I'm offering my Tag #12 for your inspiration this week.  To be eligible for the prize drawings at the end, you must have all 12 tags linked up by midnight Eastern Time on December 17th.  You can find a link to each week's post at the top of the right sidebar.  There will be $100 in gift certificates randomly given out as follows - $50 to the grand prize winner and $25 each to two runners up.  If you are a winner, sadly, you will have to wait to use your gift certificate until I reopen the boutique in January.  But the good news is that I will have a 10% re-opening sale so you will be able to get more for your gift certificate at that time!

It's so annoying when photos don't do a piece of artwork justice.  I love the way this tag came out, but I just don't think the photos reflect how pretty it is.  I spent over an hour photographing and editing photos, but still didn't get a great outcome.  

This is a two layer tag.  The bottom layer is the jumbo manila tag itself which has been gold embossed with the Fabulous Flourishes stamp and sponged with a combination of Festive Berries and Barn Door distress inks.  The top layer is actually a smaller tag, gold embossed using the Book Covers stamp.  The Happy Holidays stamp is from the Mini Holidays 3 set.  The Carved Ornaments die was used for the ornament which was embossed with the Snow Flurries texture fade and gold embossed with Judi-Kins Egyptian Gold EP.  The crinoline poinsettia was made with the Tattered Florals die.  And that wraps up Tag #12.

I hope you have had as much fun as I had playing in this challenge this year, and that it has helped you make some of your cards and tags for Christmas.  Thank you to everyone who as visited and a special thanks to those who have played along!


Sunday, December 2, 2012

Winter Beauty

Hello!  I'm back this Sunday morning with a tag I made for my weekly guest post over at Artistic Outpost.  This peaceful winter scene was created with the wonderful Midwinter set.  Using a jumbo manila tag, I embossed, inked and glittered the woodgrain.  The images were stamped with Coffee archival and the tag was embellished with a gold tulle bow, pinecones and branches cut from kraft core with the Tim Holtz Tattered Pinecone die.  Another simple piece with just a few supplies I brought with me on my move.  I'm still feeling embellishment challenged.  Every time I reach for something I need, I find I forgot to pack it.  I was struggling for a pop or red or green ribbon on this but none available.  It looks a little bland to me :(

Thanks for stopping by.  I hope your December is off to a great start!


Saturday, December 1, 2012

Santa Claus is Coming!


Good Saturday morning friends and followers!  After a rugged moving week, the DH and I are camping out at my parents' home while we continue to try to purchase a home.  I managed to bring a few basic crafting supplies with me but everything else has gone into storage.

Saturday, of course, is Our Creative Corner challenge day and our theme this week is Santa Claus is Coming!  Rudlis is our hostess again this week and she wants us to use a vintage Santa image along with something red.  She has even kindly provided a vintage Santa image over on the OCC blog for you to download if you wish.

I started with a jumbo manila tag and stamped images in Coffee archival ink.  The images are from the Stampin' Up! Christmas Lodge set as well as music from Tim Holtz's Mini Holidays #4 and script from Wendy Vecchi's Live and Make Art.  The Santa image on the left is from Artistic Outpost's Snowy Woods and the one on the right is from Tim Holtz's Mini Holidays.  I had previously made up the heart, which was cut with a Spellbinders die from a Pepsi can and run through the Checkered Texture Fade.  Then I colored it with alcohol inks using a paint brush.  The filigree snowflakes are from my store, which of course you can't purchase from as it is temporarily closed.

Super simple tag for this week and that's what you will be seeing until I reclaim my stash from storage - I am definitely embellishment challenged at this point - LOL!

If you love vintage Santa images, be sure to stop by Our Creative Corner.  The team have all used them and the line up is sensational!  And while I couldn't use this one myself because I don't have access to a printer right now, I will also give you a freebie - one of my digitally layered vintage images.

Thanks so much for stopping by and have a great weekend!


Monday, November 26, 2012

Challenge: 12 Tags of Christmas - Funkie Junkie Style - Week #11


Good Monday morning, friends.  Welcome to all my new followers - hope you will hop aboard the 12 Tags of Christmas - Funkie Junkie Style!  If you are new to this challenge, you can read all about it here.  I'm back this morning with my Tag #11.  We are almost to the finish line now.  You have until December 17th to submit all your tags.  They can be done in any order as long as they are all finished and uploaded by that date.

Thank you so much to everyone who as played along so far.  If I haven't visited you and commented on each and every one of your entires, my apologies!  You may already know that I am in the middle of moving.  The moving van will be here tomorrow at 8:00 a.m. so right now it's pack, pack and pack.  Once the stuff is on the truck, I will have time to visit you all.  Unfortunately, we don't have a house to move into so we will be heading for my mom and dad's place to camp out for a few weeks until we figure out what we are going to do.  We did have a deal on a house, but we had to withdraw our offer on Sunday.  The inspection showed high levels of radon gas in the home.  We had the test repeated to confirm the results and the second test came back way higher than the first so we just had to walk away from that home, which broke our hearts because we thought we had finally found exactly what we were looking for.  Now we are back to square one.

Here are the deets on Tag #11.  As always I started with a jumbo manila tag.  It was clear embossed with the Fabulous Flourishes stamp and then a script stamp was stamped over the entire piece in Jet Black Archival.  After that, it was sponged heavily with Vintage Photo Distress Ink.  I created a wreath of sorts built on a rosette.
I cut multiple holly leaves using the Festive Greenery Decorative Strip die, sponged them with Vintage Photo and glued them to the rosette.  The holly berries, cut with the same die, were stained with a drop of Vintage Photo Distress Stain and then coated with Glossy Accents.  The pretty amber button is from Tim Holtz's Idea-ology line.  I cut felt leaves using the Holly Banch die and applied chunky glitter over a coat of Claudine Hellmuth's Multi Medium Matte.  The sentiment is a stamp from the Mini Holidays 4 set, the brads holding it were embossed with Vintage Photo Distress Embossing Powder.  The lovely cluster at the bottom was all cut with the Festive Greenery die.

That's it, folks.  Now it's your turn - can't wait to see how this piece will inspire yours!  Thanks again for stopping by and or playing along.  Hope you have a great week.


Saturday, November 24, 2012

A(ngel) B(utton) C(hipboard) Challenge


Hello friends and welcome back.  It's Saturday and that means it is time for another Our Creative Corner post.  

Before I get started on all the challenge details, I just wanted to mention that the time has come for me to temporarily shut the doors of The Funkie Junkie Boutique.  My business is home based and unfortunately I am going to be between homes for 6-8 weeks.  The movers are coming on Tuesday and we are putting almost everything we own into storage.  We have a contract on a home in Gainesville with a closing date of January 10th, but we probably won't be able to move in that soon.  There is a bit of work that needs to be done before we move in.  It will likely be late in January, maybe around the 20th, before we will be able to have all our possessions delivered.  I will open the shop just as soon as I can get the boxes unpacked.  I plan to restock heavily, especially with Ranger products, prior to re-opening.  I will also be having a re-opening 10% off sale.  

Thank you all for your support during this stressful time in my life!  We will be doing some traveling and also staying with my parents during that time.  I am holding out some basic craft supplies so will be able to make some simple cards and tags during that time.  I probably won't be posting as much, but I promise not to drop out of sight altogether!

Here's my card for this week's OCC challenge, made before I packed up all my craft supplies.  Our challenge this week is ABC - Angel, Button, Chipboard.  I started with a piece of plain white card stock and sponged it with Iced Spruce.  A bit of script was stamped here and there in Coffee Archival and the holly stamp from the TH Mini Holidays 3 set was stamped in embossing ink and gold embossed.  The edges were distressed with my fingernail and sponged fairly heavily with Vintage Photo.  I used a photo copy on card stock of Hark, The Herald Angles Sing for the second layer and again distressed and sponged the edges.  

The Carved Ornament die was used to cut the chipboard ornament and it was painted with Picket Fence Distress Paint.  When it was dry and nicely crackled, I went over it with the Tarnished Brass Metallic Distress Stain. But I thought it was too heavy so I wiped it back off again with a damp paper towel.  I sponged the edges with Vintage Photo and pronounced it pleasing to my (and hopefully your) eye.  I added a couple of small pieces of brass hardware from my stash.  You might want to double click on the photo to see them close up.  

The sentiment is from Artistic Outpost Midwinter and an old Spellbinders tag die was used to cut the tag.  The holly stamp from the Mini Holidays 3 set was used again on the tag, this time second generation with Coffee Archival.  The Venise lace was dyed with boiled down coffee and the floral button is Tim Holtz Idea-ology line.  

Thanks so much for stopping by today.  I hope you will pay a visit to the other designers for Our Creative Corner.  


Wednesday, November 21, 2012

Home for the Holidays


Hello and welcome to my Wednesday post.  This week I am combining my sample for Frilly and Funkie with the monthly Artistic Outpost blog hop.  This month our Artistic Outpost hop theme is Christmas and I have chosen to use the wonderful Snowy Woods set.  And great news about a sale at Artistic Outpost - you can get Snowy Woods and other Christmas stamps at 15% off.


On Sale at Artistic Outpost - Christmas Stamps ONLY 
will be 15% with 
code Christmas2012


Sale will run Wednesday, Nov 21 - Monday Nov 26th


Here's our Artistic Outpost blog hop line up.  Short and sweet - hope you will stop by these wonderful artists' blogs and leave them some love!


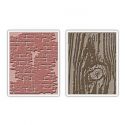
The theme over at Frilly and Funkie is Chipboard and Metal.  Plus I was looking at the Compendium of Curiosities challenge over at Linda Ledbetter's StudioL3 and the challenge is embossing folder techniques (page 64 of CC2C) so I used the Woodgrain Texture Fade on the fence, coloring it with distress ink, per Mr. Holtz's instruction on page 64 of the Compendium of Curiosities 2 book.

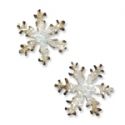
I started the project by stamping the door in Jet Black Archival ink and then coloring it with chalks, which I think work so well on these photograph type stamps.  The burlap was glued to a thin sheet of card stock and then cut with a Spellbinders die, then a second smaller tag was cut from vanilla CS to layer over it.  The snowflakes from the set were stamped in Faded Jeans DI and the tag was grunged up with Vintage Photo distress reinker and water.  The Dec. 24th calendar page was stamped in embossing ink and gold embossed, then sponged with Faded Jeans Distress Ink.  The snowflakes were cut from burlap and felt with the Mini Snowflakes Movers and Shapers die.  (Before die cutting the burlap, I gave it a coat of Multi Medium Matt on the back to hold it together).  Of course the fence was cut from chipboard with the One the Fence die.  My filigree metal snowflake was embossed with my favorite embossing powder - Enamelware.

For my background panel, I did the marbled stains technique using Faded Jeans and Tarnished Brass distress stains.  Then evergreen branches were stamped with embossing ink and gold embossed.  It was edged with gold embossing too.  It doesn't show much, but I really love the way the background turned out.


The following products used to make this card can be purchased at The Funkie Junkie Boutique - storewide 10% off moving sale through November 23rd.


Blog Widget by LinkWithin


I changed my font at thecutestblogontheblock.com