UPDATE TO THIS POST: The chipboard letters I purchased from Hobby Lobby were 2" not 2.5" letters. The post below has been corrected.
Hello again, I'm back today with details on the first three banner flags from the Chalkboard Banner I posted yesterday. It was so large that you can't really see the details of each letter so over the next couple of days, I will give you close up shots of all the flags.
The first thing I did was sort through all my Tim Holtz Layering Stencils and pulled out all the Christmas/winter themed ones. I needed 11 so I used almost all of them. Using a Ranger Glacier White craft ink pad and a mini blending tool, I stenciled a different pattern on each of the 11 flags. I heat set each stenciled flag with a heat tool to make sure it was fully dry. Sometimes the craft ink has tendency to be very slow to dry and then it smudges. The icicles were just painted on with a narrow brush using white Dina Wakley Gesso.

The chipboard is from Hobby Lobby 2" size. I just didn't have an ABC die that made letters large enough to cut my own from chipboard. I painted the chipboard white with Picket Fence distress paint. If I was doing this again, I think I wold have painted them with the white gesso. Too much gray from the chipboard showed through making them not as bright white as the stenciling. After painting and drying then, I gave each one a thick coat of Glossy Accents and then sprinkled on some very chunky white glitter from JoAnn's (a store brand I believe).

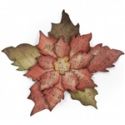
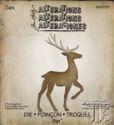
I used a couple of older Tim Holtz Bigz dies to create very simple embellishments. For L, I used Tattered Poinsettia and Kaiser Kraft white pearls that I colored red with a Copic marker. For E, the Pine Tree Bigz die was used along with a few more pearls and some rhinestones. For T, I used the Prancing Deer Bigz die. I wanted every flag to have a pop of red, so I gave him a red blanket that I stenciled with a Nordic pattern using the Mini Holiday Knit layering stencil and Glacier White ink.
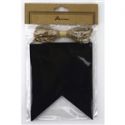
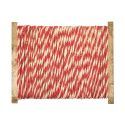
The Chalkboard Banner kit that we sell at The Funkie Junkie Boutique comes with regular twine. But to keep my red and white theme going, I switched it out for the Tim Holtz red and white jute Christmas twine. It was hard for me not to pick up my Vintage Photo ink and give all the edges a little weathering, but I wanted to keep the my whites pure for this project.
That's it for today. Stop back tomorrow to see the next few letters close up. Thanks for stopping by!

These products were used to make the above project. They are available at
The Funkie Junkie Boutique where Tim Holtz, Ranger and most other name brand products are always 20% off list.






3 comments:
Linda, this is a fabulous banner, and I can see so much time and love went into it! I'm really loving this look, and have a new point of view on "chalkboard" which I used to avoid like the plague! Can't wait to see the rest of it in detail! thank you for the wonderful inspiration! Hugs!
PS I think the thought of snow is a little ambitious for your neck of the woods! But I have my fingers crossed for eastern NC!
Wow, what an amazing banner, fabulous!!
OMG love it!!!!a project that I will definitely attempt in the near future, thank you for all the details and the what not....your amazing
Post a Comment