Monday, November 21, 2016

Challenge: 12 Tags of Christmas - Funkie Junkie Style - Week #9


Double click any image to zoom in for details.

Hello and welcome to Week #9 of the 12 Tags of Christmas Funkie Junkie Style.  Time seems to be moving faster now as we approach the holidays.  It will be a busy week for our family with our annual Thanksgiving celebration later this week.  And then there is the annual Black Friday to Cyber Monday sale at The Funkie Junkie Boutique.  There will be lots of bargains to be had so be sure to visit us!  The sale starts at 9:00 p.m. Eastern time on Thanksgiving (November 24th).  

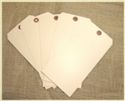
This week's tag is a bit different.  I love using jumbo shipping tags, not just for a substrate for a small canvas but also for thank you notes and, in this instance, invitations.  My DH and I hold a Christmas party each year and of course I send out handmade invitations.  So here you have the invitation to our 2016 Christmas party.  

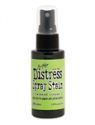
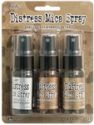
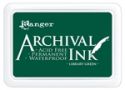
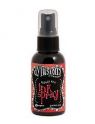
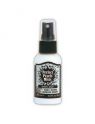
I  began with a jumbo shipping tag that we sell at The Funkie Junkie Boutique.  It was sprayed with a combination of Distress Sprays - Bundle Sage, Cracked Pistachio, Twisted Citron and Dylusions Cut Grass spray too - all sprayed at once, no drying between colors.  And then while still wet, I misted with Brushed Pewter Mica Spray from the Tim Holtz Mica Spray pack.  I wanted to give it a little silvery sheen.  Both sides of the tag were sprayed in this manner.  Once dry, using a pine needles stamp, I stamped randomly with Library Green Archival Ink.  

The top and midway down was scored to create a matchbook type of fold for my invitation.  I created the invitation panel using the online photo editing site PicMonkey.  They now offer a number of templates that you can edit to suit your purpose.  (For purposes of sharing this invitation on the internet, I have blocked out our home address with snowflake overlays on the photo. )

The snowflakes are photo overlays blocking out my home address.
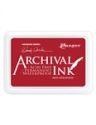
The front sentiment panel was created using white card stock to which a coat of Brushed Pewter Distress Paint was applied.  The bottle of paint I used had the old style dabber top.  While I think the new squeeze top has some advantages, I tend to like the dabber top better.  If you just apply one coat, you get a rather streaky effect, which I really liked for this piece.  I could have made it solid silver by applying one or two more coats of paint, letting each coat dry between applications.  The panel was stamped using Wendy Vecchi's Red Geranium Archival Ink with a stamp from the cute new Tim Holtz set Mini Doodle Greetings and cut with an old Spellbinders die.  

Back of invitation
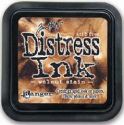
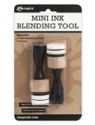
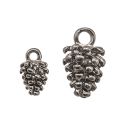
The edges were sponged with Walnut Stain distress stain using a Mini Ink Blending Tool to give it a vintage feel.  The invitation was topped off with a triple loop bow from baker's twine and two of the new Idea-ology Pine Cone charms.  I made 15 of these invitations over two evenings and got them into the mail on Saturday - yay!

I hope you will find something here to inspire you.  You have until December 19th to link up your 12 tags.  If you are new to the challenge, there is still time to jump in and earn a 10% off coupon to shop at The Funkie Junkie Boutique in January and also maybe be a random win for the gift certificates we are giving away.  You can find all the challenge requirements in our Week #1 post here.

Thank you to everyone who has played along.  I'm so delighted to see the beautiful work that is being inspired by this challenge!


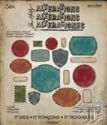
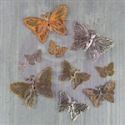
This project was created using the supplies below.  They are available at The Funkie Junkie Boutique where Tim Holtz, Ranger and most other name brand products are always 20% off MSRP.


Monday, November 14, 2016

Challenge: 12 Tags of Christmas - Funkie Junkie Style - Week #8


Hello and welcome to Week #8 of the 12 Tags of Christmas Funkie Junkie Style.  Today I have a simple tag.  I had a busy week and a weekend out of town which limited the time I had to spend creating Tag #8.  I started with what was basically a waste sheet that was left over from a project last year.  I don't even remember what it was, but I do remember spraying Dylusions Post Box Red on white CS and then adding some Perfect Pearls spray to get a few gold highlights.  Here is a picture of the background layer.


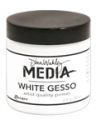
At the time, I thought it was too pretty to toss so it went into my left over box.  I cut it the size of my jumbo manila tag and glued it over the tag.  Next a Tim Holtz gold rub on was applied as a sentiment.    I found this cute vintage card and went old school with the lamp post, one of the first holiday Bigz dies designed by Tim Holtz (now discontinued - but sometimes it's nice to use the oldies too :).  I rubbed a little gesso around the edges with my finger to give it a snowy feel.  The glow in the lamp is Inka Gold rubbed onto a piece of white CS and then a coat of Crackle Accents was applied to give the "glass" a crazed effect.

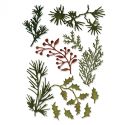
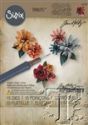
Out came my Holiday Greens Mini Thinlits die set to cut the holly and the Tiny Tattered Florals die set to create the tiny roses.  I added a couple more gold rub ons and called it a wrap.

Nothing really special about this week's tag - sorry about that.  I do hope you can find something in it to inspire you and I do hope you will play along.  If you are new to this challenge, you can find all the requirements in my Week #1 post.  There is still time to finish all 12 holiday pieces by the deadline of December 19th.

Thank you so much to everyone who has stopped by, left comments and/or played along.  I'm loving seeing the awesome work that you are all contributing!


Wednesday, November 9, 2016

It's a Mesh - Part II

Today is the Funkie posting for Frilly and Funkie and I am filling in on the Funkie side again this time.  The challenge is hosted by Pamellia Johnson and she has challenged us to create a vintage or shabby chic project using any type of mesh (crinoline, cheesecloth, tulle, burlap, canvas etc).

I decided to use two kinds of mesh - a rusted metal screen and burlap.  I wanted to make a fall piece again this week and started with a piece of Speciality Stamping Paper.  I gold embossed using Tim Holtz's Flourish stamp and then applied various brown colors of Alcohol inks.  I went over the alcohol ink, blending it with Gold Alcohol Ink Mixative.

Then I took the rusted screen and affixed it to my background with copper brads and then used Prima Copper Crackle Paste over a Tim Holtz Mini leaf stencil.  A couple of Tim Holtz dies were used to cut the greenery - the Spring Greeney strip die and Fall Foliage Thinlits die.  They were colored with Rusty Hinge and Vintage Photo distress inks plus sprayed with Prima Color Bloom 2 Pot Marigold, Poppy Filed and Spring Dandelion.  I grabbed a couple of acorns from my back yard and removed the nut, replacing them with the new Tim Holtz Baubles that were coated with with Copper Alcohol Ink Mixative.

My sentiment 'Blessed' was a rub-on adhesive from Prima and foiled with copper foil.  It was applied to a thin piece of acrylic film that was cut with the Tim Holtz Labels Thinlits die set.  My last embellishment was a Prima Grungy Butterfly.


The above piece was made with the products below.  They are available at The Funkie Junkie Boutique where Tim Holtz, Ranger and other name brand products are always 20% below MSRP.


Blog Widget by LinkWithin


I changed my font at thecutestblogontheblock.com