
 |
| Double click any image to zoom in for details |
I'm back again for my second challenge of the 2017 12 Tags of Christmas Funkie Junkie Style. Thank you for the encouraging comments and a huge thanks to Mimi for kicking off the participation in this year's challenge.
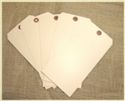
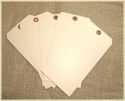
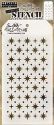
I had a fun time getting all shabby and vintage-y with this week's challenge. As always, I started with a jumbo manila tag. This time I brushed it with white gesso. When the gesso was totally dry, I used Prima's White Crackle Paste through the new Tim Holtz Starry Stencil. I let that dry overnight. It dried nice and crackly - not huge cracks, but nice fine cracks. I love the way the gesso goes on sort of spotty and dry-brushed. When both the gesso and the crackle paste were fully dry, I took a mini ink blending tool and my fave Vintage Photo distress ink and lightly blended ink over it as well as along the edges creating a delightfully worn look.

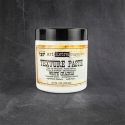
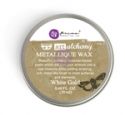
The next step on the background was to take the Prima Marketing Art Alchemy Metallique Wax - White Gold and using my finger, sort of dry brush it over the the crackled embossing and along the edges of the tag. If you haven't tried the Prima waxes, you really should. They are FABULOUS and we have just received a re-supply of all the waxes at The Funkie Junkie Boutique!
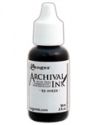
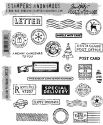
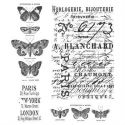
The stamping was done with Wendy Vecchi's Potting Soil Archival Ink. I used the new Tm Holtz Christmas Classic for that awesome vintage Santa image and also the Holidy Postmarks set for stamping on the tags. Also, the upper left tag was stamped with the Paris script stamp from Tim Holtz's Papillon stamp set.

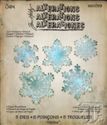
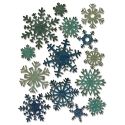
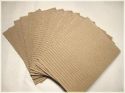
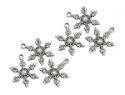
The snowflakes were cut with Thinlits dies from the Paper Snowflakes Thinlits and some from the Mini Paper Snowflakes Thinlits set. I used my favorite kraft corrugated paper to cut the snowflakes and then used my finger again to sort of dry brush some white gesso over the corrugated ridges. They each got topped off with a little pearly embeshment from the ship, that had some of the Prima White Gold wax was rubbed over it.
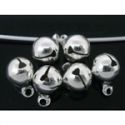
Up top, I cut two tags, one from an old Sizzix tag die and stamped it with the script stamp from Papillon set, then cut another tag from the new Thinlits Gift Tag set and stamped from the Tim Holtz Holiday Postmarks set. The three tiny jingle bells are sold (as silver) in our shop. I turned them a brown-gold color with Mushroom Alcohol ink and then rubbed on White Gold Metallique wax. The same treatment was used for the snowflake charm in the lower right. The "North Pole" tag was cut with the new Thinlits Tag set.

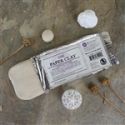
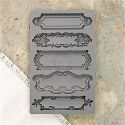
Last but surely not least, I made the white resin-style plaque using Prima's Paper Clay and Prima Marketing IOD Vintage Art Decor Mould - Object Labels 1 mould. The moulds and the paper clay are amazing. They are so cool and fun to use. The great thing about the moulds is that you can keep creating a favorite decor piece over and over. You just need the mold and a pack of the Paper Clay. I made it a day before and let it dry overnight It was curled up slightly from drying but I was able to gently straighten it out. Once flat, I whitened it up a bit with some white gesso painted on with a paintbrush. When it all was completely dry, I rubbed more Metallique White Gold wax on the high points of the moulded paper clay. The gold "Merry Christmas" is from the Gilded Accents Remnant Rubs. It adhered perfectly to the paper clay surface.
That's it for Week #2. Thank you for visiting and a warm welcome to everyone who plays along. Details about this challenge can be found in the Week #1 post here.

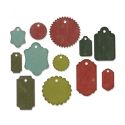
These products were used to create the above tag and are available at The Funkie Junkie Boutique where Tim Holtz/Ranger products are sold at 20% below MSRP.
 |  |  |  |  |
 |  |  |  |  |
 |  |  |  |  |
 |  |  |  |  |
 |  |  |  |  |


15 comments:
This tag is really awesome, I think I'll totally copy the technique you used, I love it!
Fabulous tag!
WOW - this tag is Gorgeous! The way you applied the gesso on the tag almost makes it look like wood. Love the Santa and the snowflakes.
This tag is so beautiful. I love the look of the neutral colors.
So gorgeous! I'm playing along this year... my friend Mitra is "making" me..lolol! I'm very excited honestly... I tried to "follow" the blog in blogger but keep getting an error message... could be on my side but thought I'd tell you in case... I was able to sign up for emails though.. I'll try the other again later! Anyway, thanks for the inspiration! Now to get to work!
Your tag is fabulous. Love the beautiful elements and the neutral colors.
Wow, I really like your amazing looking tag!!! Very very nice textures and soft colors you use. Thanks for sharing:)
Henry
Stunning! Love the tone of the whole tag and all the fun elements. Thank you for the step by step and the fabulous inspiration x Loved reading how you made it x
Oh so beautiful and elegant! I adore the gold, white, and brown color palette and your beautiful details! Fabulous tag! I came to get inspired and try to play along!
Love this Tag, it is gorgeous, so inspiring, the vibrant warm white/gold is so elegant, perfect!
A beautiful tag!
Gorgeous Linda, love the white gesso and Vintage Photo combo, distressed and aged to perfection! Will have to invest in some of those IOD molds, love the label you created. Thanks so much for sharing your lovely tag, Deb xo
Linda, this well be my favorite Christmas tag of the season! I LOVE this crackled shabby look with the touches of warm gold! Incredibly GORGEOUS! Hugs
I think I'll totally copy the technique you used, I love it!
หีฟิต
This is a beautiful tag! You have inspired me to go back to my scrappy space!
Post a Comment