Wednesday, March 29, 2017

Count Me In


Double click any image to zoom in for details
Hello,

I'm back, filling in over at Frilly and Funkie.  It's always great when they ask me to fill in, not that it is good when a design team member is out of commission, but I always seem to need a reason to make art these days!

This fortnight's challenge is "Count Me In".  Our amazing DT leader Jenny Marples is our host this time and she reminds us that "numbers are a huge part of our everyday lives so it is no surprise they are also often included in our creative ones too.  For this challenge you need to use your choice of numbers to add that special 'sum-thing' to your vintage or shabby chic project. Make them count as part of the design, not just a last minute addition!"

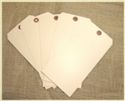
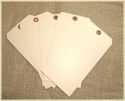
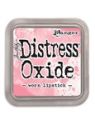
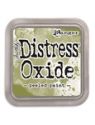
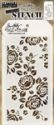
For my sample I used the new Tim Holtz Distress Oxide pads.  I created a base using a jumbo manila tag that we sell at The Funkie Junkie Boutique.  I did a smoosh and swish AKA Wrinkle Free Distress technique with the Worn Lipstick pad, then dried it with my heat tool.  Once dry, randomly stenciled on leaves using Tim Holtz's Roses (THS075) Layering Stencil and Peeled Paint Oxide Ink.

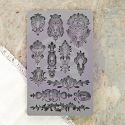
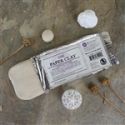
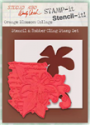
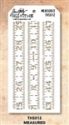
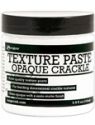
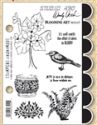
Next a focal image was stamped using the Wendy Vecchi Stamp It-Stencil It Orange Blossom Collage and Wendy's Potting Soil Archival Ink.  I stamped it a second time and used the accompanying stencil to sponge on Worn Lipstick and Peeled Paint Oxide Ink with a Mini Ink Blending Tool.  Before adhering the fussy cut second layer of the orange blossom, I used Tim Holtz's Measured Layering Stencil to lay down a layer of the new Ranger Opaque Crackle Texture Paste.  This created my numbers element to meet the challenge qualifications.

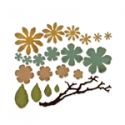
I absolutely love the Worn Lipstick Distress Oxide color.  What a pretty pink it is.  And I have always loved a pink and green combination so this worked out great for me.  Next I cut a bunch of flower layers and leaf layers using the new Small Tattered Florals Thinlits Die Set.  I cut them from white card stock.  The leaves were colored with the same smoosh and swish technique using  Peeled Paint Oxide Ink Pad and the flowers were colored wih Scattered Straw distress ink.  They were dried with my heat tool and then edged with Vintage Photo DI.

How about those awesome branches?  They were also cut with the same Thinlits die set from white card stock.  Vintage Photo DI was sponged on after they were cut and then they were coated with the new Wendy Vecchi Potting Soil Enamel Accents.  This was my first experience using Enamel Accents but it won't be my last!  I loved using them.  So fun and they dried really fast.  The flower centers were done with Liquid Pearls Rose Gold.  I meant to bring home Sunflower Enamel Accents from the shop but forgot.  Lucky I had the Rose Gold Liquid Pearls at home to use!

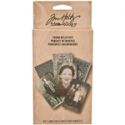
I cut a little tag and stained it with Peeled Paint Oxide ink and stamped a sentiment from Wendy Vecchi's Blooming Art with Potting Soil archival ink.  For good measure, I added a few numbers using Tim Holtz Remnant Rubs.  It was affixed with an Idea-ology Ring Fastener and to add a little frilly, I tied on a scrap of seam binding dyed with Worn Lipstick Oxide ink.  To finish it all off, I sent a little dotty with Wendy Vecchi's Leaf Green Enamel Accents.  Love the whimsey they add!

Thanks so much for visiting with me today.  I hope you will decide to play along with us.  You can find all the challenge requirements on the Frilly and Funke post here.


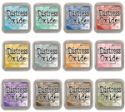
These products were used t create this above project.  They are available at The Funkie Junkie Boutique where Tim Holtz, Wendy Vecchi and most other name brand products are always 20% below MSRP.


Wednesday, February 8, 2017

A Vintage Valentine for My Love

Double click to zoom in for details.
Hello friends!

I'm delighted to have you visit with me today.  I have such a fun Valentine card that I made for the Be My Valentine? challenge over at Frilly and Funkie.  Zoe Hillman is our host and she wants us to make a Valentine card in the shabby chic or vintage style.  The challenge still has a full week to run so there is plenty of time for you to join in. The team will choose their top four picks with the winner being invited to join us in a Guest DT spot at Frilly and Funkie and the next three will receive badges to display on their blogs. Everyone who enters and follows the rules will be entered into the draw to have the chance to win a $25 spending spree at The Funkie Junkie Boutique.

I was actually off in an different tangent when I suddenly remembered that this project was specifically for a CARD. ( I'm so bad about reading challenge rules).  I had in my mind that it was just a vintage Valentine project.  So it was fairly late when I realized I needed to regroup and do something different.


For my card base, i chose a sheet of card stock from the old Tim Holtz Kraft Resist Paper Stash.  I used it for my base layer and then cut a smaller sheet, embossed it with the Subway Texture Fade and liberally sponged it with Walnut Stain DI.  It's cool the way there is a clear embossed pattern on the paper the shows up when you sponge ink over it.  On my base layer, Wendy Vecchi's Black Embossing Paste was used with her new Mini Bricks stencil and also Tim Holtz's Valentine stencil for the words.  The Tim Holtz Thinlits die set Handwritten Love was used to cut the two words Together Forever.  They were cut from black craft foam.  I love the extra dimension that gives the words.  The handsome retro couple were cut from TH's Found Relatives pack of cards and fussy cut out with his new Tonic Mini Snips.  The couple was a little white around the edges so they were also sponged with Walnut Stain DI.


Then I did something that I thought was so cool.  I wanted to do a lock and key - sort of you have the key to my heart theme.  I have been fooling around with the Prima molds and the paper clay and had a bunch of elements already made, including several fancy key holes.  I found one that fit but it was white, as is the paper clay.  I painted it with Black Soot Distress Paint and let it get almost dry, then rubbed off as much paint as I could.  I LOVE the way it came out with almost a pewter or even a gunmetal look to it - very cool!   We sell these steampunk style keys at The Funkie Junkie Boutique but it was too silvery shiny for this project so I gave it a coat of Black Soot DP too.  The piece was finished off with an absolutely perfect saying from the Small Talk sticker pack.

Even though I was a little pressed for time with a deadline, I really had a blast making this Valentine's card.  It's a great guy Valentine and I think my DH will really enjoy it.  Thanks so much for visiting!


The products below were used to make this card.  They are available at The Funkie Junkie Boutique where Tim Holtz/Ranger and most other name brand products are always 20% below MSRP.

Friday, February 3, 2017

Friday Focus on Wendy Vecchi/Studio 490


Good morning friends,

Just a quick post to share a project I have over on the Frilly and Funkie blog for our current Friday Focus.  We are focusing Wendy Vecchi/Studio 490 products, most of which will be an extra 15% off through February 15th at The Funkie Junkie Boutique.  I had a blast creating this project and if you stop by Frilly and Funkie, there will be a brief tutorial on how I made it.  

Blog Widget by LinkWithin


I changed my font at thecutestblogontheblock.com