Monday, September 23, 2013

It's Time to Play The 12 Tags of Christmas Funkie Junkie Style

Well, here we are again ready to kick off year 3 of The 12 Tags of Christmas Funkie Junkie Style.  It's just a fun little challenge that will help you complete your tags or cards for Christmas.  Each Monday for the next 12 weeks, I will post a Christmas tag.  If you wish to play along, you can make any sort of Christmas or winter themed DIY project.  It can be a tag, but doesn't have to be.  It can be a Christmas card, a holiday decoration, a scrapbook layout, a tree ornament, a banner, whatever you want but it does have to be inspired by my tag and must be Christmas or winter themed.  

Sound like fun?  A number of my blogger friends had a great time with this challenge last year and some have even played along for the past two years.  I hope you will play along.  Here are the challenge requirements, which must be adhered to in order to be eligible for a prize at the end. 
  • This is an inspiration challenge. Each week, I will post my tag and you will use it to be inspired to make something. You can enter any sort of craft.  It can be a tag, a card, a home decor project, a scrapbook layout - your choice but please make it winter/holiday related. 
  • You must take inspiration from something on my tag and tell us in your post what inspired you. You don't have to use my style, my layout, my colors, my theme or anything except be inspired by something on my sample. Your make can be shabby, it can be grungy or it can be clean and simple. I don't mind if you CASE my work, but if you do, please give me credit. 
  • We will have 12 weekly challenges beginning today, Monday, September 23rd.  You can link your project using the linky provided. If you don't have a blog, you can use another hosting site such as SplitCoast Stampers, but you must provide all required links and information in your posting.
  • To be eligible for the drawing at the end of the 12 weeks, you must: 1) enter all 12 challenges, 2) provide a link back to this challenge and mention that it is sponsored by my store The Funkie Junkie Boutique, with a link to the boutique
  • You do have to have a blog (or some other way to provide the required links and inspiration information).
  • All 12 challenges will remain open until December 22nd.  You can play any of the 12 challenges up through that date. To be eligible to win, you must have submitted an entry into all 12 of these challenges by midnight Eastern Time December 22nd.
  • On December 23rd, from the pool of players who participated in every single challenge and provided a link to the challenge and a link to my store on their post, I will draw three winners. There will be one $50 grand prize gift certificate to The Funkie Junkie Boutique given out plus two runner up prizes of $25 gift certificates. 
  • Additionally, everyone who participated in all the challenges and met the requirements will receive a 10% off coupon good for their entire order at The Funkie Junkie Boutique during the month of January 2014.  
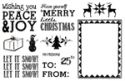
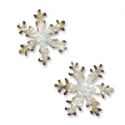
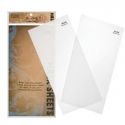
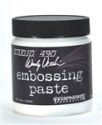
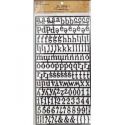
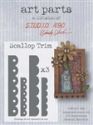
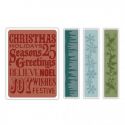
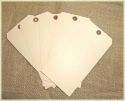
Here is your inspiration piece for week #1.  I made it using the brand new Artistic Outpost release Christmas Chalk.  I had such a great time working with this new set from Artistic Outpost.  Here I started with a jumbo tag from my boutique and cut a piece of black card stock to fit over it.  The solid white snowflakes were made using Wendy Vecchi's white embossing paste.  I created my own snowflake stencil by cutting Tim Holtz's mask product with the mini snowflake movers and shapers dies.  The flourish is white chipboard that I spread Glossy Accents on and then sprinkled on chunky glitter.  The icicles at the top, which are white CS embossed with a TH texture fade and trimmed out, also had glitter applied in the same method.  I ran a border down the left side made with the Wendy Vecchi Art Parts Scallop Trim.  I found something out about the Art Parts.  They always feel too thick and clunky for me.  So this time, I took an exacto knife and split it down the middle.  It was so easy - it came apart very cleanly and I really like the thickness of it once it was halved.  So the border you see here is actually one piece of scallop trim, split lengthwise down the middle and the two pieces laid end to end.  I painted them black with distress paint and when dry, rubbed white craft ink over it with my finger.  I used Idea-ology Alpha Parts to spell out Let it Snow, rubbing white craft ink over them too.  Then I couldn't get the white craft ink to dry on the Alpha Parts so I ended up (don't laugh) painting it over with clear nail polish - LOL (okay, go ahead and laugh, but it worked great)!

That's it - the rest is self-explanatory, but let me know if you have questions.  And I'll be looking forward to having you play along with us this year!


These products used to make this tag are available at The Funkie Junkie Boutique where Tim Holtz/Ranger products are always 20% below MSRP.


Sunday, September 22, 2013

It's Tag Time Again!

Hello friends and welcome to new followers, so happy to have you stopping by today!  I have lots to share with you today.  First these fun country style tags that I made with the new Artistic Outpost release Christmas Chalk.  If you haven't seen this new plate, you should check it out!  It's very versatile and will be great for Christmas crafting this year.  I chose to go the chalkboard route on most of the samples I made with it and really love that look.  

I'll share the details on each tag but before I do, I wanted to also take the opportunity to tell you that tomorrow, Monday, September 23rd, I will be kicking off my annual 12 Tags of Christmas Funkie Junkie Style.  You can check out the links on my sidebar to learn about last year'schallenge.  And come back on Monday to read all about this year's challenge and to see my first inspiration piece.  But basically, the way it works is each week I will post a tag.  You will find something on it to give you inspiration and make something to link up.  It will run every Monday from now until a week before Christmas which will help you get your tags and cards done for Christmas.   And if you complete all 12 weeks by the deadline and follow all the rules, you will be entered into a drawing for a gift certificate from The Funkie Junkie Boutique.  I'm giving away three GCs - one grand prize for $50 and two runners ups for $25 each.  And as little gift, anyone who plays and completes all 12 entries will receive a coupon for 10% off their entire purchase at The Funkie Junkie Boutique, good for the month of January 2014.  So come back on Monday to see my first inspiration piece and learn all the challenge requirements.  Please note: You must have a blog to play in this challenge.  Sorry, but I'll explain in the rules on Monday.  
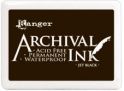
And now for the deets on my tags.  Here's a quick and easy little tag.  The tag base was cut with an old Sizzix tag die from white card stock.  I inked it with Vintage Photo DI, glued a piece of a book page to it, then ripped half of it off again.  I sponged on a bit more Vintage Photo ink and laid the tag on top of a small round doily folding the edges up and around the edges of the tag and gluing them down.  I stamped the TO/FROM stamp on a piece of white CS, cut it with a Spellbinders die, did some first, second and third generation stamping with the snowflake stamp and Jet Black archival ink, grunged it up a bit with Vintage Photo DI and added burlap and a rhinestone.  A bit of twine makes a tie for a package.
Next up, I cut a piece of kraft CS with the Ornamental die and stamped the ledger stamp from Ephemera Backgrounds with Picket Fence distress paint and doodled the edge with a white gel pen. The designer paper is from the It's Christmas Time collection from Maja Design which is absolutely fabulous.  I used the Tim Holtz ornament die and the Tattered Poinsettia die.  The snowflake was cut with a Stampin' Up decorative strip snowflake die.  The little snowman was stamped with Craft White ink onto black CS and trimmed out.
For the third tag, I cut kraft CS with the Baroque die.  I don't recall what stamp set I used on the back panel, but it was definitely an AO stamp.   I created the chalkboard look with black CS, swiped a bit of  white craft ink on my finger and rubbed it on the black CS.  Then I stamped with the white craft ink.  The holly was cut with the Festive Greenery decorative strip die from green kraft core and sanded.  I made the berries with an old tube of something similar to Liquid pearls but it has sparkles in it.  When it was dry, I colored them with a copic marker.
And the last one, just a quickie, cut with the ornament die from white CS and stamped with the ledger sheet again, this time in Coffee archival.  Plus I stamped the pine tree and holly leaves from Chirstmas Chalk.  I quickly finished it off with a few gold ballls and a piece of knotted twine.   

And that's it, my friends.  All the supplies and tools that are available in my store are listed below.  Be sure to come back by tomorrow for the kick off of the 12 Tags of Christmas Funkie Junkie Style.


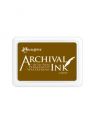
These products used to make the tags are available at The Funkie Junkie Boutique, where Tim Holtz/Ranger products are always 20% below MSRP!

Wednesday, September 18, 2013

Apple Pickin' Season

Hello and thanks so much for stopping by today.  Our challenge this fortnight over at Frilly and Funkie is Eat, Drink and Be Merry - sounds like a party to me!  Since I'm in high fall mode right now, I wanted to feature something that was in keeping with the autumn season. I grew up in upstate New York and the fall was always apple pickin' season so that's where I sent with this card.  I used a lovely pre-colored vintage style tag from Isabella's Sketchbook (I guess she is out of business because I couldn't pull up her digi webstore).

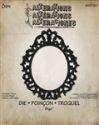
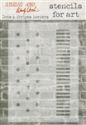
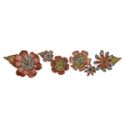
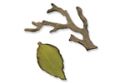
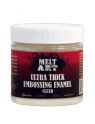
I put a few new craft supplies to work here plus used some old standbys too.  The bottom/outer layer is white card stock, stenciled with the Wendy Vecchi Dots and Stripes border stencil, next layer up is also white card stock stamped with a new Wendy Vecchi backgrounds stamp (sorry none available at this time in the store - check back in a couple of weeks - I only got one in and kept it for myself - how selfish of me, right?).  Then I tried out the new Tim Holtz Ornate Frame die (you're going to see a lot of this one - I love it and yes, it is available in the boutique).  The apple blossoms were made with the Tattered Flowers decorative strip die and the branch is from the Mini Branch and Leave M&S die set.  I made the centers by painting some of my old jewelry making supplies plus a tiny fastener with a mixture of a couple of colors of Vintaj metal paints.  The leaves were sponged with Mowed Lawn and Vintage Photo distress inks.  The viney flourish was cut with an old, old, old, Cuttlebug die (one of my first ever) and coated with ultra thick embossing enamel (UTEE).  I love the formal country feel of the stripes and the black and white, but couldn't resist throwing in a bit of rustic with the corrugated cardboard.  And Tim's Simple Sayings set always makes the perfect sentiment.

I think that wraps up the deets for this one.  Let me know if you have any questions.  I hope you will stop over to Frilly and Funkie to see what the rest of the Frilly team has made.


These products used to make this card are available at The Funkie Junkie Boutique where Tim Holtz/Ranger products are always 20% below MSRP.


Blog Widget by LinkWithin


I changed my font at thecutestblogontheblock.com