
 |
| Double click any image to zoom in for details. |
I chose a Halloween theme because there are so many wonderful craft products with Halloween themes, many of which are stocked at The Funkie Junkie Boutique. I started with a piece of corrugated cardboard and used a Black Soot Distress Paint dabber to blacken the high points and the edges of the cardboard. That became my base for this product. I backed it up with chipboard as the corrugated cardboard I sell in the shop is quite flexible. Using the new Impression Obsession Spider Web Background die, a black spider web was cut. The web was mounted on a pice of black CS that was streaked with Carved Pumpkin distress paint.
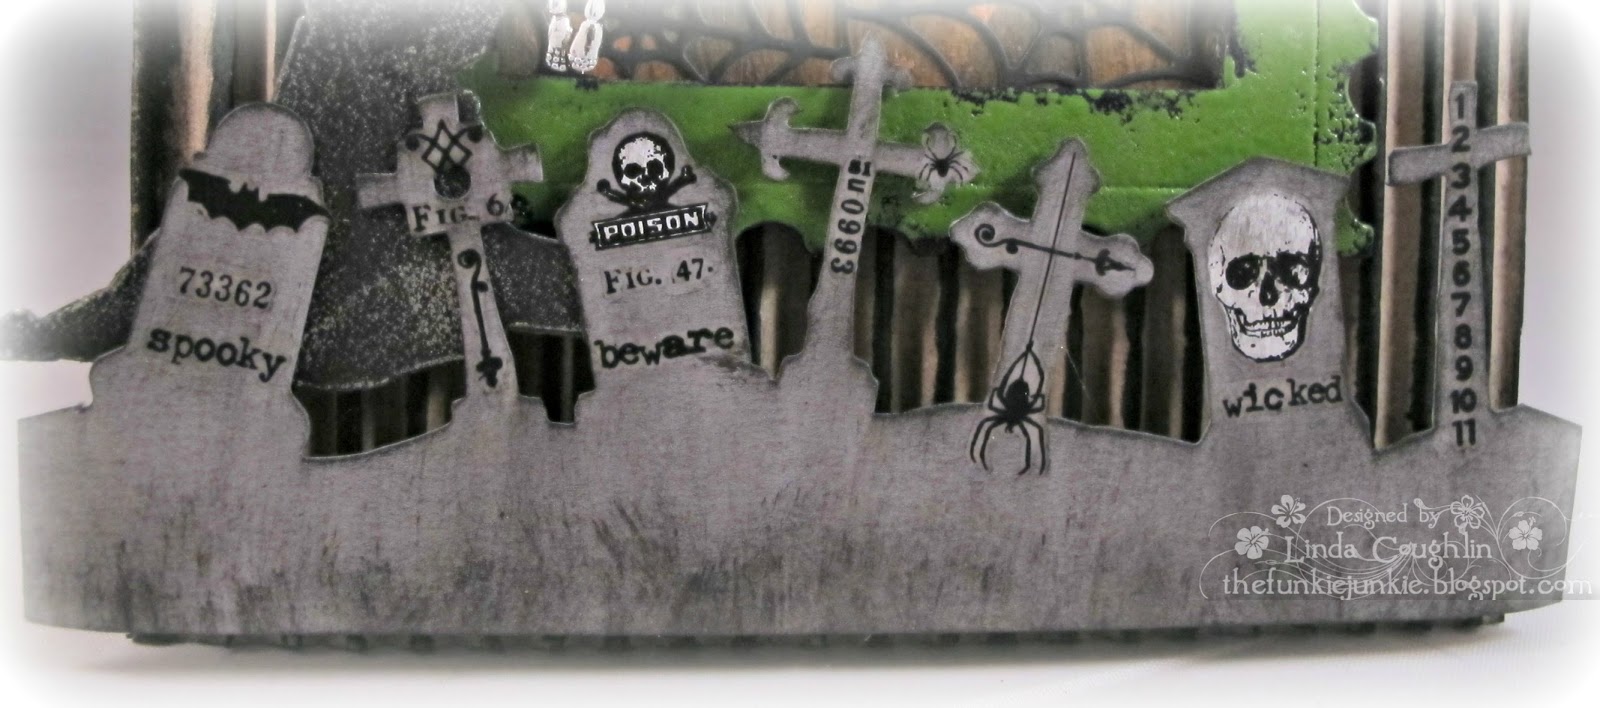
Next three layers of chipboard were cut with the Postage Stamp Movers and Shapers die. I used a Sized Rectangle die in the center to cut a window in the postage stamp. I glued all three layers together and painted it black with Black Soot Distress Paint. When the paint was dry, I heat embossed it with Wendy Vecchi's Fern Green embossing powered. Before heating it, I rubbed a bit of the powder off here and there so it would look worn. Gray card stock and the One the Edge Graveyard die produced the strip of headstones. I used this year's Halloween Remnant Rubs - Curiosities - to create a little interest on the headstones.
 |
| Double click any image to zoom in for details |
 |
| Double click to zoom in for details |
So glad I got a little Halloween crafting in under the wire this year! Thanks so much for stopping by. Wishing you a ghoulish Halloween!

These products were used to make the above project and are available at The Funkie Junkie Boutique, where Tim Holtz, Wendy Vecchi and most other name brand products are always 20% off MSRP.
 |  |  |  |  |
 |  |  |  |  |
 |  |  |  |  |
 |  |  |  |  |
 |


6 comments:
What a great Halloween project, Linda! I love the embellishments you used. The skulls on top are great! I love making things for Halloween too, but with a kitchen renovation in progress it's not happening this year!
Awesome piece Linda! Love those skulls along the top. TFS!
Fabulous Halloween project with loads of wonderful details. Love the row of skulls at the top. My instant thought was that they look like they are having a conversation about who to spook in the graveyard, which is pretty spooky on its own. Love the colours and that striped ribbon is so cool and I would love to know how you did that. So glad you found time to play because this is so wicked.
Hugs!
Cec
awesome work linda. love it all. hugs rachel x
What a great Halloween project! Love that green frame, it really pops
How much fun is this!!! LOVE the remnant rubs on the gravestones and that vibrant cobweb background. Jenny x
Post a Comment