Tuesday, November 28, 2017

2017 Challenge: 12 Tags of Christmas - Funkie Junkie Style - Week #10


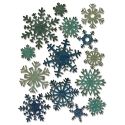
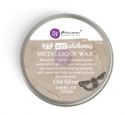
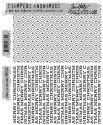
Tim Holt Tinsel stencil, Mini Paper Snowflakes, Sparkle & Christmas Stamp, BoBunny Glitter Paste, Prima Marketing Metallique Old Silver Wax
Double click any image to zoom in for details.

Welcome to Week #10 of the 12 Tags of Christmas Funkie Junkie Style!  My apologies for running a day late this week.  The Thanksgiving holiday just took me out of my routine, with family visiting and then trying to get the Thanksgiving weekend sale off the ground at The Funkie Junkie Boutique.  And I have to admit to dragging my heels a bit on posting #10 because I'm just not crazy about the way it turned out.  Although, it is growing on me.  I like it more today than I did yesterday - LOL.

It is definitely understated and doesn't make a comanding presence.  But once you begin to appreciate the sparkly glittery elegance of it, hopefully you will like it too.  Unfortunately, the camera can never capture the true sparkle of the original.

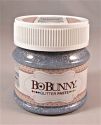
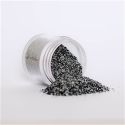
I recently discovered BoBunny's Glitter Paste when I read a post on Autumn Clark's blog about using it.  Wow, I knew then that I had to get my hands on it.  Fortunately one of my suppliers for the Boutique had it and I've stocked some in the Boutique.

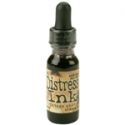
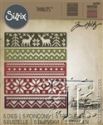
I started with a blank jumbo manila tag and slatered it lightly with white gesso, then blended Vintage Photo distress ink over the entire tag.  Next I lightly inked the Sparkle stamp and randomly touched it to the tag.  I didn't want full coverage, but rather a worn look.  The die cuts were made from plain white card stock.  Once the background was created, the next step was to apply the Silver Glitter Paste through the new Tim Holtz Layering Stencil - Tinsel.

The bow was quickly colored with Festive Berries Distress Stain with the dabber top, so quick and easy to color with the dabbers.  I'm still annoyed that they have been discontinued.  The wreath and the sentiment panel were colored by blending Pine Needles on white CS and then spritzing with water.  All three pieces were rubbed with Prima Metallique Old Silver Wax (I'm addicted to that stuff!).


The snowflakes were cut from a manila tag that had been painted with white gesso.  Once cut, the Old Silver wax was applied lightly with my fingertip.  The large snowflake was made the same way but instead of wax, I applied Silver Stickles for a glittery effect.  The center of each snowflake was also embellished with Silver Stickles.  I had to settle for 'Winter Wonderland' as a sentiment.  I wanted 'Let it Snow'.  I searched every stamp set and die set I had for that sentiment and couldn't believe that I just don't have one!  The sentiment was silver embossed.

Here is one more shot of the tag on an angle which shows the shine a bit more.

Tim Holt Tinsel stencil, Mini Paper Snowflakes, Sparkle & Christmas Stamp, BoBunny Glitter Paste, Prima Marketing Metallique Old Silver Wax
Double click any image to zoom in for details.

Thank you so much for stopping by.  I so appreciate everyone who has visitied and especially those who have joined in the challenge.  If I haven't been by your blog yet to say hello and see your work, I will definitely try to stop by this week.  If you are new to this challenge, there are still four weeks to create and link up 12 tags or other Christmas/winter themed projects and qualify for the prize drawings and a 10% off coupon to use at The Funkie Junkie Boutique in January (on your pre-orders if you wish!).  You can find all the challenge details/requirements in Week #1 post here.


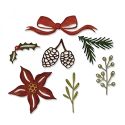
The products below were used to create the above tag.  They are available at The Funkie Junkie Boutique where Tim Holtz/Ranger and most other name brand products are alway 20% below MSRP.


Monday, November 20, 2017

2017 Challenge: 12 Tags of Christmas - Funkie Junkie Style - Week #9

Double click any image to zoom in for details

Hello friends and visitors,

Week 9 is upon us!  Time is flying and we are now 3/4 into this annual challenge.  But no worries!  Even if you haven't started, there is still time to complete the challege and qualify for gift certificate prizes and a 10% discount to The Funkie Junkie Boutique in January!  Simply complete 12 holiday winter/Christmas themed tags by December 29th.  You can find all the challenge requirements in my week #1 post here.


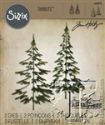
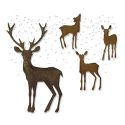
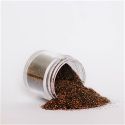
Let's get into the details of my #9 tag, of which there aren't many.  Starting with a jumbo manila tag, I gave it a coat of white gesso, using a coarse brush because I wanted some brush marks to show.  Once dry, Chipped Sapphire distress paint was applied with a dabber top.  (I know that Ranger has changed all their distress paints over to flip tops, but I still prefer the dabber tops.)  Once that was dry, I used a spatter brush to apply Picket Fence distress paint spatters.  This is where I ran into a problem!  Once the Picket Fence distress paint dried, it had turned a light pink color instead of white.  Oh my!  I thought my spatter brush must have been used for red or pink in the past and tainted the white.  I had to start all over again.   I washed the spatter brush very thoroughly with soap this time, let it dry and made another tag.  Using Picket Fence distress paint again, I spattered white over the Chipped Sapphire.  Again, when it dried it was pink!  I can only conclude that some sort of chemical reaction occurs between the two colors, even though when distress paint dries it is supposed to be permanent.  So I had to make a third tag with the blue background.  This time I used white gesso.  It dried white this time, no problem.  I just don't like spattering the gesso as well as the Picket Fence distress paint. It's a little thicker and doesn't spatter as well.  If I did it again, I would blend maybe one drop of water into it on my craft sheet before picking it up with the spatter brush.  But I really wasn't up for making a fourth start on this tag so I forged ahead.  Next I die cut white card stock with the Woodlands Thinlit die set as well as the stag from Winter Wonderland.  The trees were given a coat of Hammered Metal embossing powder and the stag a coat of Burnt Copper Leaves EP, both from Emerald Creek.  I cut an extra layer for the stag out of light chipboard - I was actually surprised that the thinlit die cut the light chipboard perfectly.  The newer generations of Thinlits dies cut SO much better than the earlier ones did.  I wanted the stag to be thicker and stronger so I could pop it up for dimension.


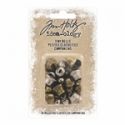
I finished it off by cutting a piece of white CS with the Holiday Knit die and painting it with Chipped Sapphire distress paint to match the background.  The stag got a little bell from Tim's Tiny Bells pack and I added some white greenery from the Festive Greens thinlits.


That wraps up #9.  Nothing too complicated this week (if you can get your spatters to stay white - LOL).  Thank you to everyone who has played along, stopped by to visit or left comments.  I'm delighted to see some new players this past week and look forward to all the inspiration you all will provide ME this upcoming week.

Best wishes for Thanksgiving blessings going out to all my American visitors!


Save

Monday, November 13, 2017

2017 Challenge: 12 Tags of Christmas - Funkie Junkie Style - Week #8

Double click any image to zoom in for details.
Hello and welcome to Week #8 of the 12 Tags of Christmas Funkie Junkie Style.

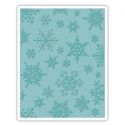
This week I strayed away from my vintage roots with a more modern Christmas color palette.  I went with Broken China and Worn Lipstick distress oxide inks.  I colored my jumbo manila tag with Broken China by smooshing the pad down on my craft sheet and then spritzing the ink with water.  The tag was laid over the ink mixture so it picked up the ink.  I dried it with my heat tool and repeated the process several times.  Next it was dry embossed using the new Tim Holtz Simple Snowflakes Texture Fade.  I dry brushed white gesso over all the embossed snowflakes with my finger and then also lightly applied Prima Metalique Old Silver Wax with my finger.  I also lightly blended a bit of white gesso around the edges of the tag using my finger.


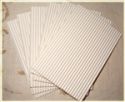
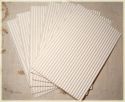
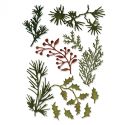
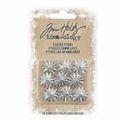
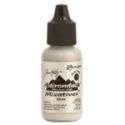
Now that the tag base was finished, I cut a white corrugated cardboard banner and rubbed the Worn Lipstick pad along the ridges to create pink stripes.  I applied Worn Lipstick to a sheet of white cardstock using the same technique that I used with the Broken China.  Once it was dried, I used it to cut snowflakes with the Stacked Snowflakes die. Each of the four snowflake layers was lightly edged with Vintage Photo Distress Ink.  I decided the snowflakes needed a little texture and lightly heat embossed two of the layers with Hammered Metal embossing powder by Emerald Creek. Hammered Metal EP was also  used on the two holly sprigs, cut with the Mini Holiday Greens Thinlits die set.  My Stacked Snowflake was topped off with a Fluted Star that I toned down a bit with Silver Mixative.


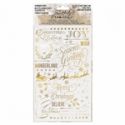
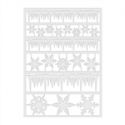
Next I cut a piece of velum the same size and shape as the white corrugated banner and applied the sentiment from the Gilded Christmastime Remnant Rubs.  The Remant Rub adhered perfectly to the velum.  The finishing touch was the line of icicles from Alpha Parts Frozen.  The icicles and the snowflakes at the bottom were rubbed with the Prima Metalique Old Silver Wax.

That's it for Tag #8.  As always, thank you to all my visitors and for the lovely comments.  An extra hug to those of you who are playing along.  It's so much fun to see how you all are interpreting my tags!  If you are new to the challenge and would like to play along, you can find all the challenge information in the Week #1 post here.


These products were used to make the above tag.  They can be purchased at The Funkie Junkie Boutique where most name brand products are sold at 20% off MSRP.
SaveSaveSaveSaveSaveSaveSaveSaveSaveSaveSaveSaveSaveSaveSaveSaveSaveSaveSaveSaveSaveSaveSaveSaveSaveSaveSaveSaveSaveSaveSaveSaveSaveSaveSaveSaveSaveSaveSaveSaveSaveSaveSaveSaveSaveSaveSaveSaveSaveSaveSaveSaveSaveSaveSaveSave

Blog Widget by LinkWithin


I changed my font at thecutestblogontheblock.com