Wednesday, October 28, 2015

Flash Sale on Recent Tim Holtz and Brett Weldele Stamp Set Releases


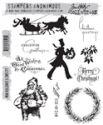
Greetings!  I just wanted to share a flash sale going on this week at The Funkie Junkie Boutique.  We are little overstocked on a few of the new release stamp sets so I thought I'd offer a little discount.  Sorry, the links on the graphic don't work, but if you just click the graphic it will take you to the Flash Sale tab in the store.

If you are not on the shop's mailing list and would like to get our newsletter with updates on new products in stock, special deals and sales, please email me at linda@thefunkiejunkie.com and I'll add your email to our mailing list.

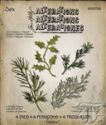
We also have most of the Tim Holtz Idea-ology Yuletide collection still in stock, but the products are going fast.  When they're sold out, that's it.  If you haven't already scooped up what you need for your Christmas crafting, you better hurry!  We also have the most recent releases of Wendy Vecchi and the Tim Holtz Sizzix Alterations dies in stock.  The Halloween dies have been discounted right now too.

Happy shopping!

A Little Halloween Fun


Double click any image to zoom in for details.
It's rare these days for me to get two posts up in one week but I couldn't let the Halloween challenge over at Frilly and Funkie go by without trying to do something for Halloween.  It's one of my favorite crafting seasons and there are a scant few days left to get crafty with it.  Shelly Hickox is hosting the challenge this time around and she was us to create Something Wicked.  That can be a Halloween themed piece or not.

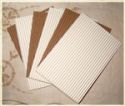
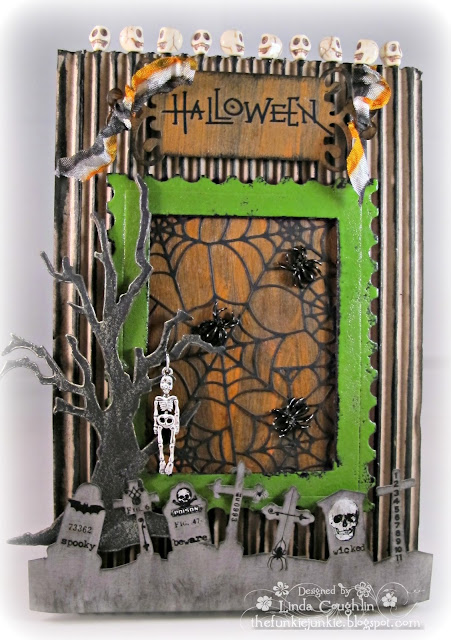
I chose a Halloween theme because there are so many wonderful craft products with Halloween themes, many of which are stocked at The Funkie Junkie Boutique.  I started with a piece of corrugated cardboard and used a Black Soot Distress Paint dabber to blacken the high points and the edges of the cardboard.  That became my base for this product.  I backed it up with chipboard as the corrugated cardboard I sell in the shop is quite flexible.  Using the new Impression Obsession Spider Web Background die, a black spider web was cut.  The web was mounted on a pice of black CS that was streaked with Carved Pumpkin distress paint.

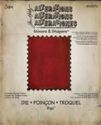
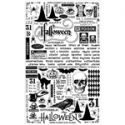
Next three layers of chipboard were cut with the Postage Stamp Movers and Shapers die.  I used a Sized Rectangle die in the center to cut a window in the postage stamp.  I glued all three layers together and painted it black with Black Soot Distress Paint.  When the paint was dry, I heat embossed it with Wendy Vecchi's Fern Green embossing powered.  Before heating it, I rubbed a bit of the powder off here and there so it would look worn.  Gray card stock and the One the Edge Graveyard die produced the strip of headstones.  I used this year's Halloween Remnant Rubs - Curiosities - to create a little interest on the headstones.
Double click any image to zoom in for details
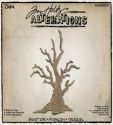
The tree was cut with the old favorite standby die - Branch Tree - from black CS, mounted on another die cut tree, this time in brown craft foam to pop it up.  I lightly rubbed Inka Gold Old Silver over the tree with my finger to give it just a tad of color and make it glow.  The spider and skeleton charms are from my shop and started as silver tone but were altered with Pitch Black alcohol ink. I wanted the skeleton to be more white than silver so I rubbed on a dab of white gesso with my finger.
Double click to zoom in for details
The sentiment plate was cut with an old Spellbinders die from a scrap of the black/Carved Pumpkin card stock that i had mounted the spider web die cut onto.  The text Halloween is a rub on from the Curiosities pack.  The skulls are beads that I sell in the shop.  I inserted half of a toothpick into the bottom and then slid it into the gap from the corrugated.

So glad I got a little Halloween crafting in under the wire this year!  Thanks so much for stopping by. Wishing you a ghoulish Halloween!


These products were used to make the above project and are available at The Funkie Junkie Boutique, where Tim Holtz, Wendy Vecchi and most other name brand products are always 20% off MSRP.

Monday, October 26, 2015

Challenge: 12 Tags of Christmas - Funkie Junkie Style - Week #5


Hello and welcome back to the 12 Tags of Christmas Funkie Junkie Style.  I hope you have all had a great week and were able to get some crafting done.  Thanks so much to everyone who has played along so far.  If you are new to my 12 Tags of Christmas challenge, there is still plenty of time to play along!  Check out the Week #1 post for all the details and then start linking up your Christmas/winter themed projects based on any inspiration you get from my tags.

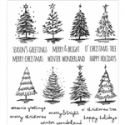
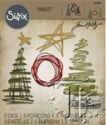
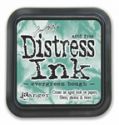
This week I decided to go scribbly and sparkly.  Using a jumbo manila tag, I broke out Scribbly Christmas set and stamped it as a background pattern using Jet Black Archival.  I blended Evergreen Bough DI over the tag and then did a little spritz and flick to give it some variation in color.  I also decided it needed a few snow flurries so I did a little spritz with Picket Fence distress spray stain and then sponged around the edges with Gathered Twigs DI.  Using a gold Deco Sheet, two stars were cut with the Festive Scribbles Thinlits dies (to cut the deco sheets with Thinlits, you will need to use the metal Precision Base Plate).  I peeled off the backing to reveal the self adhesive and adhered them to the tag.  Then I tried to cut the scribbly Tree the same way.  It didn't work.  The pattern is too loose and springy and the Deco Sheet is too thin.  It stretched out of shape coming out of the die and I couldn't fix it.  I did a do-over, this time I peeled off the backing from the Deco Sheet before I die cut it and adhered it to a piece of card stock.  That gave it enough stability that it didn't stretch all out of shape when it came out of the die.  Plus being mounted on CS gave it a little extra dimension


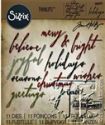
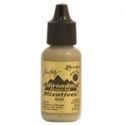
Merry & Bright was die cut out of white CS and colored it with Barn Door distress stain.  When it was dry, I went over it with Red Stickles to give it some sparkle.  A silver tone Christmas tree charm was altered with Gold Alcohol Ink Mixative and added it to a scrap of seam binding that I dyed in a striped pattern with Evergreen Bough and Barn Door stains.

Thanks so much for stopping by today.  Can't wait to see what you all make for week #5.  Don't forget that you need to a link in your post to my shop at www.thefunkiejunkie.com.


These products were used to make the above tag and are available at The Funkie Junkie Boutique where Tim Holtz/Ranger products are always 20% below MSRP.


Monday, October 19, 2015

Challenge: 12 Tags of Christmas - Funkie Junkie Style - Week #4

Double click to zoom in for details
Welcome back to Week #4 of the 12 Tags of Christmas Funkie Junkie Style.  I hope you are all having as much fun as I am, no matter whether it is just inspiration you are looking for or the challenge of making your own holiday art work.

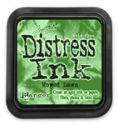
Here is Week #4 and I hope it will trigger a little inspiration for you.  As I always do, I started with one of the jumbo manila tags I sell in the shop.  They are roughly the same size as Tim Holtz's #10 tags.  The company I buy the through calls them #12 tags.  They are 8x4 inches.  I love using them because they are a great, inexpensive substrate for my mixed media projects.  Anyway, I started with a blank manila tag and Tim Holtz's Stripes stencil.  One of his tags this year used the Stripes stencil to create a plaid effect which I absolutely loved.  I think plaids are so perfect for winter crafting, especially for Christmas.  I used Barn Door and Mowed Lawn to create my plaid with the Stripes stencil.  I dried it with my heat tool and then sponged the edges with Vintage Photo Distress Ink, then ran the heat tool over it for a minute or two to make sure it was perfectly dry.

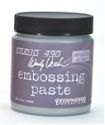
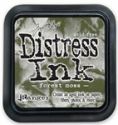
Next I used the Tim Holtz Festive stencil and Wendy Vecchi Silver embossing paste to create a pattern and dimension over top of the plaid. While the embossing paste was drying (took about an hour), I die cut the holly and greens from the Holiday Greens Thinlits die set.  For the greens, I used white card stock sponged with Mowed Lawn and Forest Moss.  Once cut, I edged the greens with Vintage Photo and stippled them a bit with white gesso.  While I had the white gesso on a stipple brush, I applied some to the miniature pine cones used here (and sold soon at The Funkie Junkie Boutique for a song :).  The spray was topped off with a velvet poinsettia from Petaloo (also arriving soon at The Funkie Junkie Boutique).


The sentiment is from Mini Holidays 5.  A piece of white CS was sponged with Forest Moss and Mowed Lawn, then the Tim Holtz Distress Sprayer to so the old spritz and flick technique.  I blotted off the water and dried it with a heat tool.  Then I stamped the sentient with Distress Embossing ink and silver embossed it.  It was fussy cut, edged with Vintage Photo, popped up with craft foam and adhered.  All the embellishments were also adhered with Ranger Multi Medium Matte.

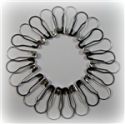
To finish it off, I added a twine bow and a couple of silver jingle bells and a Christmas bell charm, held on with a silver tone loop pin from my shop.


That's it for Week #4.  A huge thank you to everyone who has played along!  I'm always tickled to have you all playing with me.  And thanks to everyone who has left a comment too.

I wanted to take this opportunity to remind everyone of the challenge requirement which can be found in the Week #1 post.  At a minimum your post must include a link to this challenge, a link to my store as sponsor www.thefunkiejunkie.com and you must tell us what it was on my tag that inspired you.  Please feel free to email me at linda@thefunkiejunkie.com if you have any questions.


These products were used to make the above tag and can be purchased at The Funkie Junkie Boutique were Tim Holtz/Ranger, Wendy Vecchi and most other name brand products are always 20% below MSRP.



Blog Widget by LinkWithin


I changed my font at thecutestblogontheblock.com