Wednesday, October 30, 2013

Be Thankful


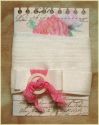
Hi there!  A warm welcome, especially to my newest followers.  So glad you are all stopping by to take a quick peek at my newest card.  I made this Thanksgiving card for the new Frilly and Funkie challenge.  Rebecca is our hostess this fortnight and she wants us "to use this challenge to create a card or project that reflects the abundance of the harvest season and the gratitude we express during the beautiful holiday of Thanksgiving".

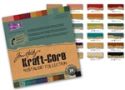
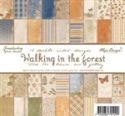
I went back one more time to the lovely Maja Design Walking in the Forest 12x12 collection for my background papers, distressing the edges with my fingernail, creating a few rips and then sponging the edges with Vintage Photo distress ink.

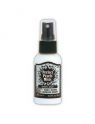
I hand dyed the lovely Venise lace, cut a tag with an old Spellbinders die from Walking in the Forest and stamped it with an equally as old Inkadinkado acrylic stamp.  I used Potting Soil archival ink to stamp with as it is the best ink to use for stamping with acrylic stamp.

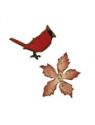
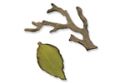
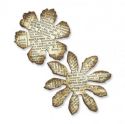
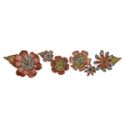
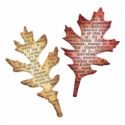
The flowers were cut with a combination of Mini Tattered Florals M&S dies as well as the Tattered Flowers decorative strip die from white card stock.  They were colored with Dried Marigold distress stain and spritzed with Perfect Pearls Heirloom Gold mist.  The leaves were also cut from white card stock using the mini Tattered Leaves die, stamped with a Wendy Vecchi polka dot stamp using Orange Blossom archival ink and then spritzed with Heirloom Gold Perfect Pearls mist.

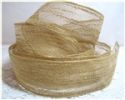
The seam binding was dyed with Dried Marigold reinker.  The triple loop bow was topped with a burlap string bow and a button.  The netting used to accent the flower was dyed with Faded Jeans distress stain.

That's it for this week.  Please do stop by Frilly and Funkie to check out the rest of the Frilly team's samples.   Thanks again for stopping by. 


These products used to make this card are available at The Funkie Junkie Boutique, where Tim Holtz/Ranger products are always 20% below MSRP.


Monday, October 28, 2013

Challenge: 12 Tags of Christmas - Funkie Junkie Style - Week #6

 Hello!  Welcome back to the 12 Tags of Christmas Funkie Junkie Style!  I hope you all had a terrific (and crafty) weekend.  I'm back for week #6.  Yes, that's right folks, we are half way through the 12 tags of 2013!  But don't worry.  You have another six weeks to finish all 12 tags - all 12 links are open through December 22nd and you can complete the tags in any order.  All the "rules" are found in Week #1 post.

Here's my tag #6.  I had promised more traditional Christmas colors this week so I decided to go back to the Maja Design It's Christmas Time patterned paper.  I love the muted vintage country style of this collection.  I started with a one of the jumbo non-branded manila tags sold in the boutique and stamped the text stamp from Stuff to Say in Jet Black archival.  Next, two pieces of the designer paper were cut to layer over the tag.  I distressed the edges with my fingernail, ripping them a bit, and then sponged the edges with Vintage Photo DI.

A rectangle was cut from what CS with one of the Sized Rectangle M&S dies and then cut again across the top with the Torn Notebook On-the-Edge die.  It was sponged with Vintage Photo DI and then stamped in Frayed Burlap DI with the pine needles/pine cone stamp from Mini Holidays 3.  I decided I wanted a little bling so I misted it with Perfect Pearls Heirloom Goldl mist.  The '25' was cut from plain gray chipboard and then painted white with Picket Fence distress paint.    When dry, it was edged with Vintage Photo DI and stamped with the ledger stamp from a Wendy Vecchi set.  Then it was also misted with the same Perfect Pearls mist in the Perfect Pearls color.  The cute little cardinals were cut with the Mini Poinsettia and Cardinal die from kraft core paper, sanded and accented with colors using Copic markers.
The pine tree was also stamped with the text stamp from Stuff to Say, sponged with Iced Spruce and then sponged a bit more with Frayed Burlap, then painted with Clear Rock Candy crackle paint.  The bow is natural woven jute ribbon which is sold in the boutique.

Thank you so much to everyone who has played along.  And if you haven't, I hope to see you joining in before the end of the challenge!


The supplies below, used to make this tag, are available at The Funkie Junkie Boutique, where Tim Holtz/Ranger products are always 20% below MSRP.

Wednesday, October 23, 2013

Halloween Bling

Double click for close up
Hello!  Thanks so much for stopping by.  I'm sharing the tag I made for Week #2 - the Funkie week over at Frilly and Funkie - of Trace's "What's Your Poison" (Halloween in black and green but no orange challenge).  I thought I'd give the new Tim Holtz Distress Glitters a whirl.  And oh my, did it ever come out gaudy - LOL!  I did have fun playing with those wonderful vintage style glitters and actually I am not much of a glitter girl, but those are terrific.  I was reluctant to dive into this whole distress glitter thing, but as usual with Tim Holtz's products, when I do finally try them, I end up super impressed and loving them.  My favorite so far is the Vintage Photo, but the Black Soot is pretty cool too.  

I started with one of the jumbo manila tags from my shop and did the marbled stains technique with Dusty Concord, Peeled Paint and Black Soot, sprinkling a bit of Pewter Perfect Pearls over the mix to introduce a bit of shine.  Next, the spider web pattern was dry embossed and I rubbed a silver stamp pad over it to make it pop.  I got some silver in places that I didn't want it and ended up dragging the pad up and down the tag to disguise the mistake.  I like the way it looks, sort of like moonlight streaming down over everything. 

The Rickety House and Iron Gate were cut from plain chipboard and stained black/Seedless Preserves, then coated with Glossy Accents and the glitter sprinkled on.  The spider was cut from grunge paper - 2 times and glued together.  I cannot get chipboard to pop out of the spider die.  It sticks and and gets ripped apart every time.  So I went with Grunge Paper and if you are careful, you can peel it out without breaking it.  I made two and glued them on top of each other to get the thickness I wanted.  I totally forgot to stain it with Peeled Paint before I coated it with Glossy Accents and sprinkled on the Peeled Paint distress glitter.  Soooooo, I then used a paint brush to paint it over with Peeled Paint Distress Stain.  After applying the stain, I heated it with my heat tool and it started to bubble.  Very cool - I love the uneven surface that the spider took on.  I kept thinking it looked like some kind of radio active giant spider coming down from the sky to devour the house :)

For the windows in the house, vellum was stamped with a spider web pattern with Jet Black archival and the reverse side was swiped with Antique Linen DI to get it sort of an illumination look.  In retrospect I should have used a brighter yellow to give it more of a candle lit effect.  

For the sentiment, I stamped Happy Halloween onto white CS with Seedless Preserves DI, trimmed it out and sponged it with Vintage Photo and edged it with black.  It still wasn't spooky enough so I randomly applied embossing ink and embossed with Black Soot distress EP.  That pleased me with the way it looked.  

I hope you will stop by Frilly and Funkie to see the amazing pieces the design team have in store for you.  


These products used to make this tag are available at The Funkie Junkie Boutique, where Tim Holtz and Ranger products are always 20% below MSRP.
Blog Widget by LinkWithin


I changed my font at thecutestblogontheblock.com