Hello friends and visitors. This week it's week #4 for the 12 Tags of Christmas Funkie Junkie Style. Again this week, I'm having fun with foil. I know foiling has been around the paper crafting world for a couple of years now, but I never used it much. All of a sudden, I can't get enough of it - LOL. Especially gold for the holidays although I'm thinking I will give silver a run too.
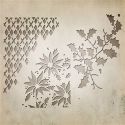
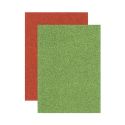
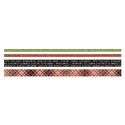
For this tag, I started, as I always do, with a jumbo manila tag that we sell at The Funkie Junkie Boutique. I cut out the corner element using the new Tim Holtz Mixed Media Christmas Thinlits die and then gave it two coats of white gesso. I used a coarse paintbrush to apply it because I like the vertical brush strokes to show. Then, using a small piece of white CS, I applied the Christmas red deco sheet to it so it would show through the die cut pattern. When I did the die cut, I saved the tiny holly leaves, colored them green and then applied green Stickles. When dry, it was like putting a jig saw puzzle together - I had to figure out which holly leaves went where. The new Christmas Tidings Design Tape was used to create a pretty top for the tag.
BTW, I always cut a similar sized piece of chipboard and glue my tag to the chipboard. It keeps it stiff, not allowing it to curl as one-layer paper craft projects are likely to do. I also add a chipboard easel to the back so it will be self-standing. I use the old Tim Holtz Small Easel die to cut the easel.
Next, using the Poinsettia Mini Layering Stencil (from Set 19), I stenciled on the poinsettias. I used Wendy Vecchi's Red Geranium ink for the stenciling, after covering up all the holly on the stencil with removable tape. That's a fiddly job but I didn't want the holly leaves stenciled in red. The Red Geranium was too red to match the deco sheet so I toned it down a bit by stenciling over it with Wendy Vecchi's Watering Can gray.
Then I went for the foil. This time to adhere it, I used a glue stick, just running it lightly down the edges and then applying the foil. I love the spotty coverage that gives. Looking at my tag at that point, I felt I had too much white space above the large poinsettia so I dug out my old Tim Holtz Flourish stamp and added a foil flourish using Sticky Embossing Powder to adhere the foil.
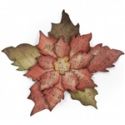
Now it was time to create my crinoline poinsettias. I used two dies, the Mini Poinsettia Movers and Shapers and the Tattered Poinsettia Bigz die for the smaller top ones and the two smallest poinsettia die cuts from the Bigz die for the bottom one. They were colored with Barn Door and Cracked Pistachio distress stains, crunched up in a ball and dried with my heat tool. After adhering the layers together, I used a good sized dot of Multi Medium Matte in the center of each one and while wet, poured gold micro beads on them
That's it for Tag #4. I hope you can find something here to inspire you to make a holiday project. If you do, you are invited to play along in this challenge. All the rules can be found in the Week #1 post about the challenge.
Thank you so much to everyone who has stopped by and especially to those who have left comments and the wonderful friends who have already entered the challenge. It's so exciting to me to see the entries coming in!

The items below were used to make this tag. They are available at The Funkie Junkie Boutique where Tim Holtz/Wendy Vecchi and most other name brand products are always 20% below list.











This is so pretty and so involved. I love the poinsettia background and the woodsy feel(I'm thinking birch)
ReplyDeleteBeautiful tag!
ReplyDeleteThis is gorgeous! I love the cut out poinsettias in the background and the gorgeous ones you created. This is going to be a challenge for me as I have none of the products you used so I will have to put on my thinking cap. :)
ReplyDeleteBeautiful, love all the gold touches!
ReplyDeleteLove love this festive red and white combo and your gorgeous flowers! We are on the same track as I was just making crinoline poinsettias this weekend! Fun stuff! Linda, you have two posts for this project that are identical. Blogger did that to me yesterday too. Ugh. Don't want any confusion with the linkups, so hope you can adjust before the entries come in. Hugs, Autumn
ReplyDeleteI really love the poinsettia theme here Linda x
ReplyDeleteBeautiful tag Linda! Really inspired by the poinsettias, and the colours you used.
ReplyDelete