If you are new to the challenge, you can find all the details in the Week #1 post here. And I'd like to take this opportunity to remind each and every player that there are a couple of requirements that must be met in order to be in for the three gift certificates to be drawn at the end as well as receive the 10% discount to The Funkie Junkie Boutique. Those requirements are 1) you must indicate in your post what you were inspired by from my tag, 2) you must link back to my post, 3) you must say that the challenge is being sponsored by The Funkie Junkie Boutique and link to this URL www.thefunkiejunkie.com and 4) all 12 projects must be linked up by 11:55 p.m. Eastern Time on December 21st. Please feel free to email me (thefunkiejunkie@gmail.com) with any questions about the challenge.
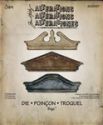
All righty then, on to Tag #12. I apologize for the delay in getting the tag posted today but I when I finished the tag late Sunday night, I decided it wasn't really finished. My tag needed a topper and I wanted to use one of the Pediments die cuts but I didn't own the die. But I knew were I could get it first thing in the morning - The Funkie Junkie Boutique - about a mile from my house - LOL! So I ran right over to the shop early Monday morning and pulled one from inventory to have for my very own. I've wanted that die for a long time and have been resisting it.
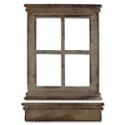
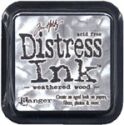
For Tag #12, I've made the cutest tag to wish you all a Merry Christmas. For the longest time, I have been wanting to try Jenny Marples brilliant weathered wood technique. She did a tutorial for Frilly and Funkie a few months ago demonstrating her technique. Check it out here. I used her technique, which came out perfectly, to create the base layer for my tag...the outside wall of a home. From there, I used Tim's Window and Window Box die to cut heavy chipboard for my window. I actually cut two layers of chipboard and glued them together for extra strength. I ran the top layer through Tim's woodgrain texture fade, then painted it white with Picket Fence distress paint. I wasn't crazy about the white window so I gave it a light coat of Walnut Stain distress paint, leaving a bit of white showing through. I liked the way that looked. The window was made with a pice of acrylic packaging and glued to the back of the window frame.
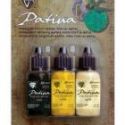
I knew that I wanted to put a wreath on the window. I love that look. The front of my home not only has a wreath on the front door, but a wreath with a big red bow on every front window. But looking past the wreath, I wanted to show the interior of the home. I stamped Wendy Vecchi's Christmas tree from her Holiday Art set and decorated it with Distress Stickles. I also created a classic Christmas window candles by cutting toothpicks in graduated sizes. They were painted with Antique Linen distress paint and glued to the back of the window frame. They also needed a flame and a wick. I used my Vintaj patina paints, putting just a drop of yellow and black on my craft sheet, picking up a tiny bit on the very end of a toothpick and drawing the wicks and flames on the acrylic window. I was so pleased with the look and the way it worked out.
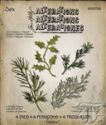
Now for the window box which of course must contain poinsettias. I did't think I would be able to find any die in my stash small enough to cut tiny poinsettias, but my trusty favorite Tattered Flowers decorative strip die came through. I cut the tiniest flower on the die strip for the red part of the poinsettia and the next smallest one for the green backing. They were cut from white CS and colored with Barn Door and Mowed Lawn distress stains, then edged with Vintage Photo. I cut a few sprigs of greenery with the Holiday Greens die set from white CS and colored them with Iced Spruce distress stain for backing. That finished off my window box.
My sentiment is from the Old Fashioned Christmas stamp set, stamped with Vermillion archival ink and clear embossed onto vellum paper. I wanted the lovely wood background to show through. I really wanted to stamp it directly onto the tag surface, but I was afraid with the folds in the tag simulating the edge of wood planks, that it wouldn't stamp evenly. I didn't want to ruin my beautiful faux wood!
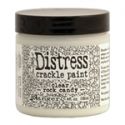
My pediment topper was cut from two pieces heavy chipboard glued together. The top layer was painted with Picket Fence distress paint, dried with my heat tool and then painted with Clear Rock Candy crackle paint.
That's it folks. I mean it's really IT for the 2014 run of The 12 Tags of Christmas Funkie Junkie Style. Thanks again to everyone for their support of my annual project. It's been a fun run for me. Hope you have enjoyed it too!

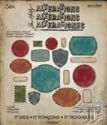
These products were used in making the above tag and area available at The Funkie Junkie Boutique, where Ranger/Tim Holtz and most other name brand products are always 20% below MSRP.


















Lovely Linda, the wreath set against the window looks fabulous and I love the background too. Hugs x x x
ReplyDeleteOh I love it! Lovely finish to wonderful twelve weeks of inspiration!
ReplyDeleteFabulous! I can't believe we're at the end! This is a great finish!
ReplyDeleteFantastic Linda! I just love the rustic cottage feel to this one! As a small town girl, I find I'm really drawn to the out-doorsie styles and you really added so many textures straight from Mother Nature! I love it! holiday hugs :)
ReplyDeleteWOW! I feel honoured that you wanted to try my weathered wood technique Linda and it's worked perfectly here. I LOVE the window frame and the festive wreath and look forward to getting this one completed. Thank you so much for all this wonderful inspiration. Jenny x
ReplyDeleteWOW Linda. This tag is amazing. Stunning.
ReplyDeleteOH MY WORD...what a marvelous finale to this year's 12 tags. I have most certainly enjoyed your creativity and you have definitely challenged me artistically. Absolutely GORGEOUS tag Linda. It's the essence of a cuddly warm Christmas.
ReplyDeletehugs to you and can't wait to play.
Lisa x
Linda, your 12 Tags of Christmas challenge has been spectacular! Each week a new, brilliant tag to inspire us--This final Week 12 tag is no exception!! It's homey and warm and inviting and can I say HOW AWESOMELY CUTE are those itty bitty little candles in the window?!!! OMG!! Thank you for sharing your wonderful creativity with us!! Cheers & Merry Christmas to you and yours!! XOXO-Shari
ReplyDeleteWow, this is beautiful. The detail is incredible. Great job and I have very much enjoyed this year's 12 Tags of Christmas. Thanks for all the inspiration.
ReplyDeleteA spectacular finale Linda...thanks so much for such a fun challenge again this year. I have so enjoyed it...just need to photo #12 when there is some day light! Merry Christmas x
ReplyDeleteI love this tag - what a perfect end to twelve weeks of inspiration! I have so enjoyed all of your creations and playing along with the challenge. Merry Christmas!
ReplyDeleteI can't believe it's the final tag! I love the colours & techniques on this beauty Linda! Thanks for all your wonderful festive inspiration this last 12 weeks.
ReplyDeleteMerry Christmas Wishes!
Alison xxx