 |
| Double click any photo to zoom in for details. |
Hello and welcome to Frilly Wednesday! It's a new challenge this week over at Frilly and Funkie. Our shabby chic extraordinaire, Nancy Dyes, is our hosts for this fortnight and her challenge is to finish up our Christmas preparation by making a vintage-themed holiday card. Easy peasy, right? Well, my cards and tags are never really easy peasy. I struggled for an entire evening to make this simple little tag. It was one of those that just didn't want to come together. I fiddled and I fussed, I moved things around, I rejected elements and added things at the last minute, until I ran out of time. I am fairly satisfied and I have to say that the real life one is much prettier. After fussing and fiddling all night long, I then couldn't seem to get a decent photo of it. I did take this one in natural light this morning but it still isn't the best. I so envy people who have amazing photographs of their work on their blogs!
At any rate, I started with my normal jumbo manila tag from The Funkie Junkie Boutique, embossed it with an older Tim Holtz texture fade and then sponged it with Vintage Photo. Nope, didn't like that so much so I decided I was going for glittered white. I brushed the entire tag with gesso and sprinkled on Clear Rock Candy glitter while it was wet - it adhered nicely :) Once dry, it was edged with Walnut Stain.
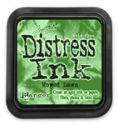
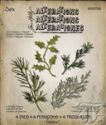
I've had this wonderful vintage tag that I downloaded from Lilac & Lavender awhile back and have been wanting to use. If you love vintage images, Megan Berry over at Lilac & Lavender has some awesome freebies. (Thanks, Megan!) But what to use with it? I seem to be stuck on gold right now and started having visions of vintage gold. I cut the two smaller poinsettias from the TH Tattered Poinsettia die (such a shame that one has been retired!) and embossed them with the coordinating texture fade. Plus I did an extra one of the larger poinsettia for the green leaf bottom. They were sprayed with Tarnished Brass distress spray stain. I had originally blended on Pine Needles DI on the leaf layer and the flourishes, but they looked so aqua that I went back over them with Mowed Lawn to green them up a bit.
The heart was a left over from a project last year and I rubbed a bit of the Tarnished Brass spray around the edge with my finger. The flourishes were cut with the Festive Greenery decorative strip die. I dug some wonderful old gold flecked rick rack out of my stash for the bottom border.
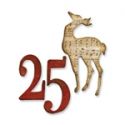
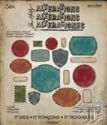
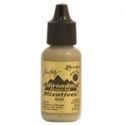
I die cut the '25' and the holly leaves and heat embossed them with Queen's Gold EP but the '25' just didn't look right with the holly leaves sticking out so I decided on making a gold 'seal' with the new Thinlits labels dies and heat embossed it with Queen's Gold EP too. Then I took a bunch of the tiny acrylic accents from The Funkie Junkie Boutique and painted them with Gold Alcohol Ink Mixative. I love the flat gold look it gives, rather than shiny. It looks so vintage! I finished it off with a snippet of red and white pinstriped ribbon that I pulled out of my stash.
Well, it took almost four hours but I was finally happy with my little vintage style Christmas tag. I hope you can whip up something vintage and holiday-ish for our challenge. Do be sure to stop by Frilly and Funkie to see the other beautiful pieces by the rest of the design team.

The products below were used to make this tag and are available at The Funkie Junkie Boutique, where Tim Holtz/Ranger and most other name brand products are always 20% below MSRP.







This is a wonderful shabby tag with a great vintage image. I love all the different elements you have added.
ReplyDeleteHugs!
Cec
This is beautiful, Linda! I love the tag within a tag and the vintage image you used!
ReplyDeleteGorgeous Linda! I love your poinsettia and flourishes, great layering! The red and gold are so elegant and festive together, just fabulous! hugs :)
ReplyDeleteIt's soooo beautiful!!! I'm in love with all the yummy texture!!! Magical and inspiring!!! TFS :)
ReplyDelete