 |
| Double click on any image to zoom in for details. |
Hello and welcome back to the 12 Tags of Christmas Funkie Junkie Style! It's great to have you back with me for week #7. A huge welcome to our new players and thanks to everyone who has linked up a project. I continue to be inspired by your fantastic entries to this challenge. I'm always tickled to see how a spark of inspiration from my work becomes a fire of creativity for you!
This week I had some fun with embossing paste, stencils and distress sprays. It all started with an ornament I saw somewhere on Pinterest. I thought I can do that with my ornament die, stencil and glitter. I had in mind to do Victorian pinks and burgundy. I didn't end up with quite those colors, but I am still happy with the result. I started by cutting the ornament out of white card stock and stenciling on Tim Holtz texture paste with the Gothic stencil. I immediately sprinkled Antique Linen distress glitter onto the wet embossing paste. The glitter stuck pretty well but as I handled the ornament a lot, moving it around and trying to get it right, some of the glitter started coming off. I ended up taking a toothpick with Glossy Accents and carefully painting the Glossy Accents onto the raised areas that were bare of glitter and then sprinkling on more Antique Linen glitter. In the end, you couldn't really tell where I had to add more glitter. I edged the ornament with a bit of Vintage Photo. The bow is seam binding that was spritzed with the new Tarnished Brass distress stain spray, crinkled tightly and dried with m heat tool. Then I made one of my triple loop bows (tutorial) and glued it onto the ornament.
So now I had my ornament and my background but it needed something else. Out came my old Tim Holtz holly die as well as an old Tim Holtz snowflake texture fade. I cut the leaves from white CS and embossed them with the snowflake die. Then I put a few drops of Tarnished Brass stain on my craft sheet and wet my finger with it, rubbing it lightly over the embossed snowflakes and the edges. The three holly berries were also white CS, painted with Tarnished Brass distress stain and then covered with glossy accents (sorry there is a bubble in one that I didn't notice in time to pop). I popped each "berry" up with a small pop dot for dimension.
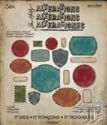
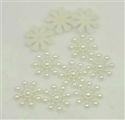
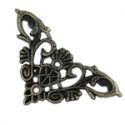
Using one of the new Thinlits labels, I cut a small label, stamped it with an Artistic Outpost stamp and anchored it with one of the pearly acrylic snowflakes from my shop - I colored with an alcohol marker. The top needed something too, especially since the jumbo tags I use are larger than the Tim Holtz stencils. I had the piece of doily sitting on my desk already stained, left from an other project. That worked perfectly, coupled with one of the pretty bronze filigree corners, also from my shop. I dabbed on a bit of Tarnished Brass stain so it coordinated with the color palette. I'm here to tell you that I am completely hooked on the Tarnished Brass spray stain! If you only buy a couple of the stains, I would recommend the metallics - they are wonderful!!
I can't wait to see what you all will make this week. If you are new to the challenge, there is still plenty of time to join in the fun. Check out the Week #1 post for all the challenge requirements and then go create!

The products below were used to make the above tag. They are available at The Funkie Junkie Boutique where Tim Holtz/Ranger and most other name brand products are always 20% below MSRP.


This one is a beauty Linda. This stencil is one of my favourites. My creative juices have been stirred......can't wait to have a play x
ReplyDeleteOh Linda, this one is just fantastic!!! I love, love, love the background (and can just imagine that it looks even better in real life). The ornament is amazing too and I adore how you put it all together.
ReplyDeleteI am terribly sorry I am not able to play along properly this year, but will definitely be back next year and am going to try and at least play along this week....
Truly sumptuous! x
ReplyDeleteBeautiful! I am going to have to play with my stencils and the layers of the sprays in the background caught my eye I am glad you shared how you did that so I can play with the same colors!
ReplyDeleteI love this tag, Linda!! It is so gorgeous and the inspiration is everywhere!! Can't wait to start on my own version!
ReplyDeleteGosh this is Beautiful Linda!! I love those colors- very reminiscent of Victorian Christmas
ReplyDelete(at least in my mind!heehee)
Oh Linda this is gorgeous. Love love the colors. They are spot on.
ReplyDeleteLinda, this is one gorgeous and elegant tag! I love all the texture and rich colors. Love this Christmas tag! Hugs!
ReplyDeleteOoooh, so pretty! I want to reach out and touch it. So much inspiration here, I'm not sure where to start! I can't wait to run to my craft room and get started.
ReplyDeleteTruly stunning. My favourite so far I think.
ReplyDeleteJulie x
Linda this one is stunning. I love the background. I'm playing catch up but I will finish this year!
ReplyDeleteStunning tag, I love the rich textures.
ReplyDeleteThis is really one of the most beautiful tags I've seen. It has that luxurious heavy textured feel but with such class and flair. I had a wonderful time with this challenge. :)
ReplyDeleteStunning tag Linda! I love the details and colors!! Thanks for the inspiration!
ReplyDeleteJen