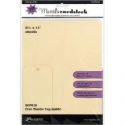
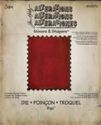
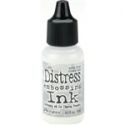
Once the background was done, I cut three layers of chipboard with the Postage Stamp die. After gluing them together, I painted them black with an acrylic paint dabber. I love the way Wendy Vecchi has been using her new embossing powders over black. (She used Clearly for Art black film. I tried to order some of the boutique, but its out of stock at Ranger and now is back ordered. ) After drying the acrylic paint with my heat tool, I used embossing ink on the front of the frame and then sprinkled on Tree Branch embossing powder. I knocked off the loose excess and then lightly went around the outside/inside with my finger to knock off some EP in random patterns. Once heated on, it just gives such a cool warn look to the piece! Once the frame was finished, the manila CS was trimmed to fit and adhered to the back side of the frame.
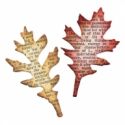
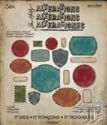
Once the frame was finished, it was time to create my focal piece. Using the new Labels thinlits dies from Tim Holtz, I cut two sizes from manila CS and stamped the sentiment and a leaf from the Wendy Vecchi Nature's Art set with Potting Soil and Orange Blossom archival inks. The labels were shaded with Potting Soil and Orange Blossom too. Next I cut all the tiny leaves and other objects with the Autumn Gatherings die from kraft CS and colored them by sponging with various colors of distress inks. Then they were edged with Brushed Corduroy and glazed with either Glossy Accents or Crackle Accents (I meant to do them all with Crackle Accents, but had both on my desk and somehow mixed them up so about half of them got Glossy instead of Crackle - LOL!) When dry, I arranged them to fit, glued them with Multi Medium Matte and layered the labels over them using the new Ranger foam tape to separate the layers so the leaves could be tucked under.

The following products were used to make this project and are available at The Funkie Junkie Boutique where Ranger/Tim Holtz/Wendy Vecchi and most other name brand products are always 20% below MSRP.













Oh my goodness so many ideas to try from this incredibly beautiful piece Linda! I love how the embossing powders look on that black painted surface and the mix of crackle and glossy leaves works really well. And then there's that fabulous stencilled background - so clever and effective! A work of art. Jenny x
ReplyDeleteI love everything about this piece, colours , stencilling and the whole autumnal feel.
ReplyDeleteThe leaves are great!
XxxRuth
Wow, Linda! I love this piece!! The colors are fantastic and I love the enameled look you used. Just a wonderful Fall project!
ReplyDeleteLOVE LOVE LOVE all the embossing! Just fabulous! And what a gorgeous Autumn look!
ReplyDeleteThis is very gorgeous, an exquisite fall creation!!! Crafty hugs, Coco x
ReplyDeleteLinda...this piece is stunning! There are so many cool techniques and ways to use different products here! I love the colors you have used. The EP in the black background is amazing! I love how you created and used your own homemade stencil. That background is gorgeous! Your work always blows me away. <3 Candy
ReplyDeleteI think it has all been said.... but you have made fantastic use of Wendy's new EPs, this project is stunning! Hugs, Anne x
ReplyDelete