Wednesday, February 25, 2015
It's Time for a Get-Away!
Hi friends, I've bene super busy trying to get all your pre-orders shipped out. I hope you are all happy with them, especially those of you who were among the very first to receive the Abandoned Coral. And you aren't already a customer at The Funkie Junkie Boutique, you should check out all the FANTASTIC new products. We're busy every day trying to get pre-orders out as the new products arrive.
Despite that, I managed to squeeze in a little bit of crafty time. This card was made for the new challenge kicking off at Frilly and Funkie this week. Cec is our host and she lives in the frozen north - Canada! Cec is dreaming of a tropical get-away and is challenging us to make something holiday/vacation themed. I didn't have a particular destination in mind and I love vintage travel labels so I dragged out an old SU stamp set and stamped the background with a variety of archival inks. It was a little bright for the vintage piece I had in mind so I took an ink blending tool and applied a light coat of Vintage Photo DI to the entire panel. Then I distressed the edges. Now I like it!
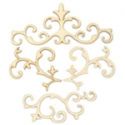
The tag is an older Wendy Vecchi stamp of a B&O Railroad ticket. I added one of the new KAISERCRAFT laser cut wood embellishments that came into the shop this week and topped it off with a handmade flower. I stamped two more of the travel icons on white CS, distressed them and die cut them. The All Aboard image was cut with one of the Tim Holtz Labels thinlits and the tag was cut what a very old Spellbinders die. I added a few remnant rub phrases using the new Tim Holtz remnant rub tool. If you haven't tried it and are a fan of remnant rubs, you must get yourself one of those. They work so beautifully for putting down the remnant rubs. I have a few left in the shop and have about 60 more coming in by Friday.
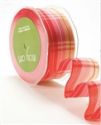
A wire pin was used to hang the tag and a tiny heart shaped red crystal. I had been cutting up ribbon remnants to send as samples to my design team and as I cut that beautiful new red plaid one, I thought it would look wonderful on this card to get just a bit more of a pop of red. The fiigree corners are a daily new addition to the shop also. I used a but of gesso to rub over each on with my finger. It just adds an nice shabby element.
I hope you like my little get away card. You can find loads more inspiration over at Frilly and Funkie. Thanks so much for stopping by today and for all your lovely comments.
The products below an be purchased at The Funkie Junkie Boutique were Ranger, Tim Holtz, Wendy Vecchi and most other name brand products are always 20% below MSRP.
Wednesday, February 18, 2015
Winter Blooms
Double click any image to zoom in for details |
Hello and welcome back to my week two post for the Frilly and Funkie Winter Blooms challenge. Sue Carrington is our host this fortnight. Since it's winter and our gardens are looking a little dull, Sue's challenge is to spruce them up by adding handmade flowers to our projects. I wanted to keep the pale icy look of winter to my blooms. I started with a jumbo manila tag from my shop, as I always do and applied Tim Holtz's texture paste through his new Flourish stencil. When it was totally dry, I sprayed the tag with several coats of Cracked Pistachio Distress Spray Stain followed by sprays of Lindy's Stamp Gang Van Dyke Sepia. Isn't this just a gorgeous icy glow to this tag? I went over the high spots of the embossed flourishes with Vintage Photo DI to really make them pop. I used the new Mixed Media thinlits die to cut the grungy die cuts top and bottom from kraft CS and sponged them with Walnut Stain DI.
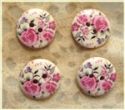
My flower was cut from crinoline using the Tattered Florals and Jumbo Tattered Florals dies. I stained it with the mix of dyes I use to dye the seam binding I use in the shop. I love that faded vintage pink. It was topped off with a pretty floral wooden button. The leaves were cut with the Spring Greenery die from white CS and also sprayed with several layers of Cracked Pistachio and Van Dyke Sepia, then edged with Vintage Photo DI. I added copper colored micro beads to the stem for some extra texture.
My sentiment was die cut with the new Handwritten Love thinlits die set from Tim Holtz. It was cut from white CS and then I gave it a wash of the same dye I used on the crinoline flower so everything would match.
I needed something to put up top where the tag hole is and pulled out a silver heart charm. But I really wasn't happy with the color so I messed around with it until it was altered to a color that I thought coordinated with my tag. I started by lightly rubbing some Antique Silver Inka Gold on it, but that didn't cover the silver enough. I decided to go for my alcohol inks and mixed a drop of gold mixative with a drop of terra-cotta and then added a couple of drops of snow cap. I used an Alcohol ink blending tool and felt to apply it to my silver charm. That was almost where I wanted it to be and decided to add just a tiny bit more of the Antique Silver Inka Gold. Finally I was happy with the color and texture. I added a little Remnant Rub I wasn't sure if it would stick, but it worked great. I used Tim's new Remnant Rub tool which works AWESOME! We just got our first shipment in this week and they are almost sold out already, but never fear, we have lots more on order!
I'm offering my tags for sale for $7.50 and free shipping in the USA, which is basically my cost, just to move them out of my craft room. I back my tags on heavy chipboard so they are not curled or wrinkled. And they come with a chipboard easel that can be affixed to the back of the tag to make it stand up if you wish. If you would like to purchase this or any other piece you see on my blog, please email me at thefunkiejunkie@gmailcom.
Thanks so much for stopping by today and for your lovely comments. Most of the products used to make this tag can be purchased from my on-line shop The Funkie Junkie Boutique. The thumbnails below will take you there.
I hope you will stop by Frilly and Funkie to see more Winter Blooms and maybe even play along with your own vintage creation.
These products were used in the making of the above tag and they are available at The Funkie Junkie Boutique where Tim Holtz and most other name brand products are always 20% below MSRP:
Saturday, February 14, 2015
Wendy Love
Double click any photo to zoom in for details |
Hello and welcome back! I hope you had a wonderful Valentine's Day. I'm sad it's over because I still have a lot of heart art swirling around in the creative portion of my brain. I really wanted to do a few more Valentine projects and you might see a couple more before the end of February. I made this over a week ago for Wendy Vecchi's Make Art heart challenge this month, but just haven't had time to share it with a blog post. I'm a little fuzzy on the background details so I hope I will tell you the correct way I made it. Anyway, I started with one of my jumbo manila tags, as I always do and then I laid it in my spray box and sprayed it with my new Lindy's Stamp Gang Van Dyke Sepia. I had used this same spray box a few weeks before when I had sprayed four or five sheets of CS with Dylusions Post Box Red. Of course, the Post Box Red was dry, but spraying over it again with the Van Dyle Sepia rehydrated the Dylusions spray and seeing all that shiny red mixed with the Van Dyke Sepia was too much to resist. I turned my tag face down in it and smooched. Not only did it pick up splotches of red, but do you see those red vertical stripes? They are the corrugated ridges on the cardboard surface - so cool - I absolutely loved the look.
Next I took Wendy's Never Enough Hearts stencil and cut two heart masks which I arranged on my tag. Then I stamped the tag with one of my favorite stamps - Wendy Vecchi's new Script background stamp. It was also included in an older set and is a main go-to stamp for my backgrounds. It stays on my desktop at all times. The masks were removed and I used the stencil to trace around the unstamped heart space with a Stabilo pencil. I stamped a couple of romantic sentiments from Tim Holtz's Stuff to Say set in jet black archival ink.
For my focal point, I used the IndigoBlu Flitter Glue and Flakes. I stamped Wendy Vecchi's sweet new stamp from the Bouqet SiSi with the Flitter Glue and applied the metal flakes. I absolutely LOVE the way it came out. The color, shine and style fit the background of the tag so well. And I love the multi colored flakes that come in the kit. I know the process probably sounds hart or intimidating, but it's actually very easy and almost foolproof. Once I had my flaked stamping set, I decided the tag needed just a small touch more so I used a couple of Remnant Rubs - the birds and TRUE LOVE on the tags. I finished it off with a heart brad and a little heart key from the shop and inked the edges with Black Soot.
This was an absolutely delight to make because I just played and played. I didn't have a deadline and worked on it over several evenings when I needed a little break from the shop work.
Thanks so much for stopping by. Don't forget, my artwork is all for sale at low prices because it's stacking up in my craft room and I want to send it off to a good home. Most cards and tags are just $7.50 which includes free shipping in the USA. If you are overseas, please email me for a shipping price.
The products below were used to make this tag and can be purchased at The Funkie Junkie Boutique where Wendy Vecchi, Tim Holtz/Ranger and most other name-brand products are always 20% below MSRP.